
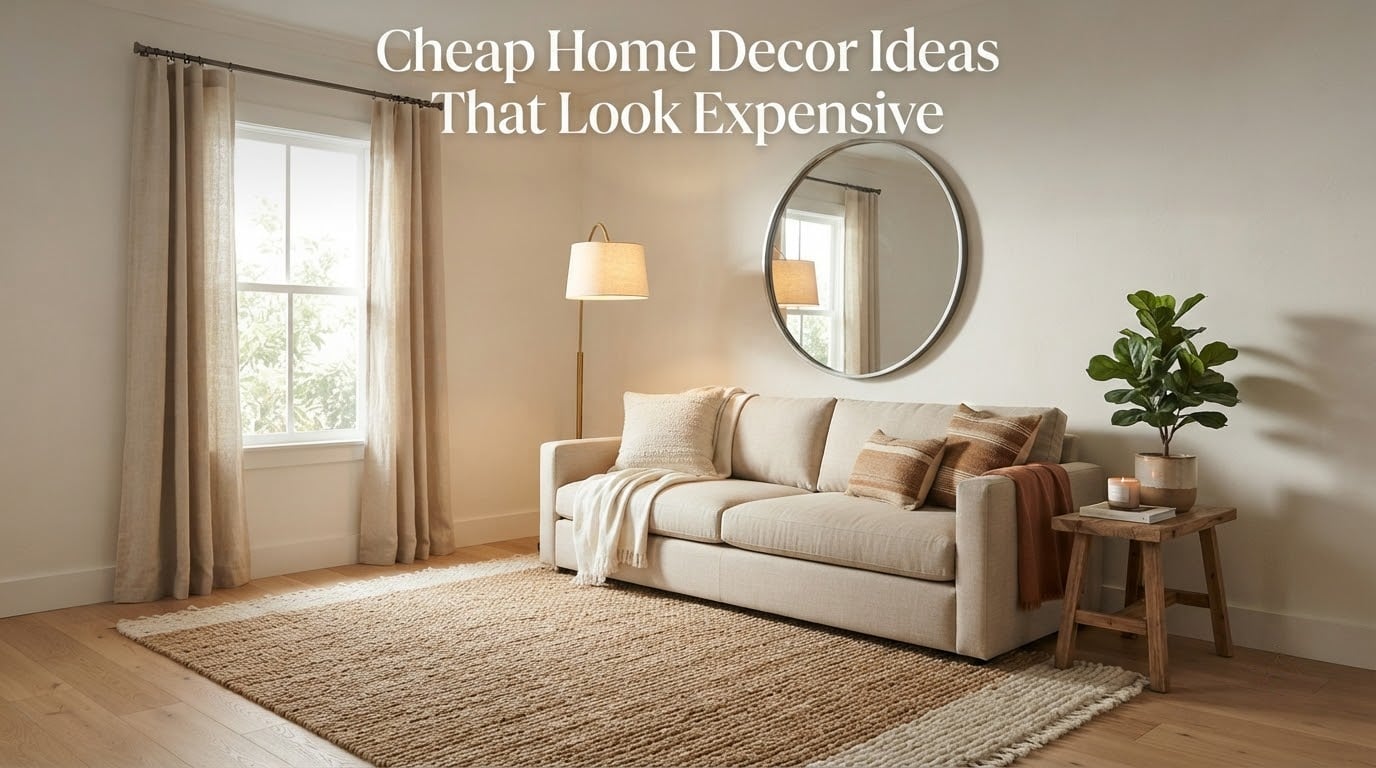
Cheap home decor ideas that look expensive all share one thing: they change how a room feels before anyone notices what is in it. The eye does not read a shopping list. It reads light, scale, texture and a single place to rest, and it judges the whole room off those four things.
That is good news, because the four cues that make a space look high-end are the cheapest ones to fix. A warm bulb swap, a rug sized so the front legs of the sofa sit on it, a curtain rod mounted high and wide, one oversized mirror or one large piece of art. No new sofa required.
What does not work is buying ten small things. In the r/Frugal thread “What inexpensive item made your home feel more luxurious?” the most common answer by far was not an accessory. It was a lighting change or a window treatment change, something structural about how the room was lit or proportioned.
This guide breaks the whole thing down so you can act on it this weekend. Fifteen specific moves, each with a cost band, a time commitment, a difficulty level and a no-drill version for renters. Plus a table that puts every idea side by side, the designer formulas worth memorizing, an honest look at thrift hunting, and the anti-list: the ten things that make a home look cheap, which no competitor page covers.
Cost is described in relative bands throughout, because retail pricing moves and regional pricing varies. Very low means a single inexpensive item you can buy in one trip. Low means a modest outlay plus an evening of work. Moderate means a weekend project worth planning for. Higher means a single item that carries a room, so it is worth saving for rather than splitting across several cheap ones.
Last reviewed for 2026. Every idea below has been applied in ordinary homes, not styled shoots.
Table of Contents
- Why Cheap Rooms Look Cheap (and What Actually Changes That)
- Quick Picks: 7 Moves That Do the Most Work
- How to Make Your House Look Expensive for Cheap: 8 Steps
- 15 Cheap Home Decor Ideas That Look Expensive
- Cost, Time and Difficulty Table for All 15 Ideas
- Designer Formulas Worth Memorizing
- Renter-Friendly and No-Drill Versions
- How to Thrift Decor That Actually Looks Expensive
- Small Rooms, Low Ceilings and Basement Suites
- Room-by-Room Budget Worksheet
- 10 Things That Make a Home Look Cheap (and What to Do Instead)
- Frequently Asked Questions
- How do you make your house look expensive for cheap?
- What is the 3-5-7 rule in decorating?
- What makes a home look wealthy?
- What are 10 things that can make my home look cheap?
- What color makes a house look expensive?
- Do thrift store and dollar store decor pieces ever look intentional?
- How can I decorate a rental without drilling anything?
- What decor trends are worth following on a budget?
- Conclusion: Your One-Weekend Action Plan
Why Cheap Rooms Look Cheap (and What Actually Changes That)
A room reads as cheap for five reasons, and four of them have nothing to do with money.
The first is flat light. A single cool-white ceiling bulb throws the same brightness on every surface, which flattens texture, dulls colour and makes even good paint look tired. This is the most commonly reported cause of a home feeling inexpensive, and it is the most commonly ignored one.
The second is wrong scale. A rug too small for the seating, curtains hung a few centimetres above the window, or a modest-sized picture floating in the middle of a wide wall. The eye reads scale errors as indecision, and indecision reads as temporary. Rooms that look expensive look settled.
The third is material sameness. When everything in a room is smooth and shiny and the same tone, there is nowhere for the eye to rest. Expensive rooms layer matte against sheen, linen against wool, wood against metal.
The fourth is no focal point. A room with six competing statement pieces has no statement piece. Visual weight needs to be deliberately unbalanced so there is a heavy side and a light side.
The fifth, and the only one that is really about money, is the quality of the biggest items. Nobody in the room is touching the sofa. They are just looking at it.
So the honest answer to “what makes a home look wealthy” is not more stuff. It is warm layered light, correct scale, mixed texture, one dominant anchor piece, and repetition of a colour or material used sparingly. Those five are the whole list.
Quick Picks: 7 Moves That Do the Most Work
These are the seven that change the most per unit of effort. If your budget is tight, do these and stop.
- Swap every bulb to warm white at 2,700K. Cost: very low. Time: 20 minutes, no drilling. The single highest-impact change in the entire guide.
- Get a rug big enough that the front legs of your main seating sit on it. Cost: low to moderate. Time: one afternoon. Instant room expansion.
- Hang the curtain rod 6 to 8 inches above the window frame and 8 to 12 inches wider than it. Cost: very low to low. Time: 45 minutes. Makes windows look taller and rooms look larger.
- Replace one thing with a large round mirror. Cost: low to moderate. Time: 20 minutes plus a hunt. Reflects light and doubles what a small room appears to have.
- Swap the cabinet hardware. Cost: very low. Time: 90 minutes. Matte black or aged brass on dated golden knobs transforms kitchens and bathrooms.
- Layer three light sources at three heights in one room. Cost: low. Time: one evening. Floor lamp, table lamp, and the ceiling light off.
- Empty the surfaces and keep only five objects per shelf. Cost: nothing. Time: 30 minutes. Curated reads as expensive; crowded reads as a storage problem.
That last one costs nothing and is the most skipped. In the r/homemaking thread “I don’t know how to decorate my home,” the advice that landed hardest was to keep objects minimal and only use things deeply personal or genuinely interesting. Restraint reads as confidence.
How to Make Your House Look Expensive for Cheap: 8 Steps
Follow these in order. Each step is designed to be done in a single evening, and together they cover roughly two weekends.
- Audit the light first. Replace every cool-white bulb in the home with a 2,700K warm-white bulb rated CRI 90 or higher. CRI, the colour rendering index, measures how accurately a bulb shows true colour; 90 and up means paint, wood and fabric look like themselves. Cost: very low. Time: 20 minutes.
- Turn off the ceiling light and add a floor lamp. One lamp at floor height, placed beside rather than behind the sofa, gives a room a shadow gradient. Shadows are what make a space feel physical. Cost: low. Time: one evening.
- Resize the rug. Measure the seating, then choose the rug so the front legs of the front-most piece land on it. Cost: low to moderate. Time: an afternoon.
- Raise and widen the window treatment. Mount the rod 6 to 8 inches above the frame and extend it 8 to 12 inches past each side. Cost: very low to low. Time: 45 minutes.
- Hang one large piece instead of several small ones. A single oversized frame or canvas over a sofa reads as a decision. Five small frames at the same size read as dorm room. Cost: low. Time: 45 minutes including the hunt.
- Add texture in three materials. Boucle or a nubby wool, washed linen, and something woven such as jute or a flatweave. Repetition of texture is what cheap interiors lack. Cost: low. Time: an afternoon.
- Repeat two finishes and retire the rest. Pick aged brass and matte black, or warm wood and matte cream. Repeating a finish across the room is the cheapest form of luxury. Cost: nothing if you own the pieces. Time: an evening.
- Clear the surfaces. Pick five objects for the coffee table, five for the top shelf, and nothing else. Cost: nothing. Time: 30 minutes.
That sequence works because each step makes the next one more visible. Warm light first, then objects to catch it, then texture to break up flat areas.
15 Cheap Home Decor Ideas That Look Expensive
Each idea gives you a cost band, the time it takes, how hard it is, and what to do if you cannot drill. The “why it works” line is the part most budget guides skip, and it is the reason the move survives contact with your actual room.
Lighting
1. The 2,700K warm-white bulb swap
Cost: very low. Time: 20 minutes. Difficulty: none. No-drill version: identical, since bulbs need no holes.
Why it works: colour temperature is measured in Kelvin, and lower numbers are warmer. Overhead bulbs in the 4,000K to 5,000K range were designed for offices and warehouses, and they make a living room look like a waiting area. Dropping to 2,700K warms skin tones and makes wood grain and brass look richer. Buy CRI 90+ bulbs and nothing cheaper, because a low-CRI bulb undoes the warmth it just added.
2. The three-height lighting rule
Cost: low. Time: one evening. Difficulty: easy. No-drill version: floor lamps and plug-in sconces need only an outlet.
Why it works: designers light a room at three heights, not one. Ceiling light for general fill, a table lamp for task and warmth, and a floor lamp beside the seating for shadow. The result is a gradient instead of a flat wash, and gradients read as depth. If you can only afford one addition, make it the floor lamp.
3. The one-third chandelier rule for dining
Cost: low. Time: 45 minutes. Difficulty: moderate if wiring is involved. No-drill version: hang a rattan or drum pendant from a hook, or lean a large thrifted lantern shape over the table from a ladder.
Why it works: a dining fixture should be roughly one third the width of the table, so a small builder-grade dome over a long table makes the table look narrow and the ceiling look tall and empty. Scale is the whole game here. A thrifted brass globe, a woven pendant or a schoolhouse shade in the correct diameter will read better than an expensive fixture in the wrong size.
Walls, Paint and Architecture
4. One accent wall in a colour that reads expensive
Cost: low. Time: a weekend. Difficulty: moderate. No-drill version: a large peel-and-stick panel, or a single hung textile or framed piece on a plain wall.
Why it works: the colours that read as expensive are rarely the trendy ones. Deep, muted, slightly greyed tones such as forest green, inky blue, terracotta, warm clay and even a well-chosen near-black do more for a room than a flat saturated colour. A neutral like greige, putty or warm off-white in an eggshell finish makes cheap trim and hardware look intentional rather than tired. Budget for primer if the current colour is dark or glossy; skipping primer is the number one reason a cheap paint job announces itself.
5. Fake millwork with paint, not carpentry
Cost: low to moderate. Time: one weekend. Difficulty: moderate. No-drill version: apply removable wall moulding strips to a blank wall, or hang a large framed mirror to simulate a panel effect.
Why it works: millwork means built-in woodwork, and it is the architectural detail that separates a custom home from a tract home. A rectangle of chair rail, applied and painted the same colour as the wall, reads as panel moulding because the eye responds to the shadow line, not the material. Paint the trim and the wall the same shade so the detail appears from the shadow alone.
6. Peel-and-stick wallcovering for a focal wall
Cost: low. Time: 2 to 3 hours. Difficulty: easy to moderate. No-drill version: this is the renter’s answer, since it peels off with a steady pull and warm water.
Why it works: a patterned wall supplies the visual interest a plain room lacks, which is why one statement wall outperforms a whole room of small accents. Choose a pattern with a repeat large enough to read as texture from across the room, and use a neutral ground. Texture or tone-on-tone patterns are safer than high-contrast novelty prints, which date fastest.
Textiles, Rugs and the Soft Layer
7. The correctly sized rug
Cost: low to moderate. Time: an afternoon. Difficulty: easy. No-drill version: identical, and layer a smaller thrifted rug over a large flatweave to build the right footprint.
Why it works: a rug should be large enough that the front legs of the front-most seating sit on it. A small rug floating in the middle of a big room makes the furniture look abandoned and the floor look bigger. When a large rug is out of reach, put a large flatweave jute or cotton rug underneath and layer a smaller patterned one on top, offset, which reads as deliberate styling.
8. Curtains hung high and wide
Cost: very low to low. Time: 45 minutes. Difficulty: easy. No-drill version: a tension rod mounted as high as the ceiling allows, with finials that make it read as a real rod.
Why it works: the standard is 6 to 8 inches above the top of the window frame, and 8 to 12 inches wider than the frame on each side. Height is what makes the window look tall; width is what makes it look wide, and a wide window visually widens the whole wall. Hang them to the floor, not to the sill, unless the sill is a genuine architectural feature. The single most common curtain mistake is hanging them too small.
9. Layer three textures, not one
Cost: low. Time: an afternoon. Difficulty: easy. No-drill version: identical.
Why it works: texture is the single most-used signal of a high-end interior, and it is nearly free in a thrift store. Aim for three distinct hand-feels in one room: a nubby boucle or wool, a smooth washed linen, and a woven jute or flatweave. A room with one texture throughout looks flat no matter how good the colours are. Layer throws in different weights on the sofa rather than matching pillows in a set.
Furniture, Hardware and Focal Points
10. The cabinet hardware swap
Cost: very low. Time: 90 minutes. Difficulty: easy. No-drill version: replace the existing pull with a removable adhesive-mounted version, or use a knob backplate over the existing screw holes.
Why it works: dated shiny brass and thin plastic knobs are the fastest way to date a kitchen or bathroom. One set of matte black or unlacquered brass pulls, chosen once and repeated throughout, updates every door and drawer at once. A renter with mismatched existing hardware can pick a single finish and use it on the loose objects in the room too, so the repetition carries through.
11. One oversized mirror
Cost: low to moderate. Time: 20 minutes plus sourcing. Difficulty: easy. No-drill version: lean a large thrifted mirror against the wall on a floor bracket, which needs no fixing at all.
Why it works: a large round or arch mirror opposite a window bounces light around a small room and doubles the apparent depth. Thrifted vintage mirrors are the highest-value item in this entire guide, because a solid wood or gilded frame with real age reads as curated no matter where you found it. Place it where it reflects something worth reflecting, not where it reflects a blank wall or the neighbour’s bin.
12. The anchor piece swap
Cost: moderate. Time: a weekend. Difficulty: easy. No-drill version: skip the furniture and anchor the room with one large artwork or mirror instead.
Why it works: an anchor piece is the single dominant item a room is built around, and most budget rooms have none because everything is competing. Save up for one good sofa, one generous dining table or one large rug, and let the rest of the room be modest. High-low styling, mixing one significant find with inexpensive supporting pieces, is exactly what thrift-driven rooms do well.
Objects, Plants and Styling
13. Live plants in a ceramic planter
Cost: very low to low. Time: 20 minutes. Difficulty: none. No-drill version: identical.
Why it works: a living plant in a plain pot reads unfinished; the same plant in a simple glazed ceramic vessel reads intentional. For the least fuss, choose a snake plant, a ZZ plant or a pothos, which tolerate low light and irregular watering, which matters in a north-facing room or a basement suite. Cluster three of a single species at different heights instead of scattering five different plants.
14. One large artwork instead of a gallery wall
Cost: low. Time: 45 minutes. Difficulty: easy. No-drill version: hang a large piece from a tension rod gallery system, or lean it on the floor behind the sofa.
Why it works: scale beats count. A single oversized piece over a sofa reads as a purchase decision, while a cluster of small mismatched frames reads as dorm-room. If you want a gallery wall, keep every frame the same size and align the tops, which is the version that looks considered. Framed prints and thrifted vintage frames both work; the frame is doing the expensive-sounding part.
15. Five objects, not fifteen
Cost: nothing. Time: 30 minutes. Difficulty: none. No-drill version: identical.
Why it works: over-styling with many small inexpensive items is the most common self-inflicted mistake. The eye cannot rest, and clutter reads cheap even when every individual object is fine. Empty shelves read as unfinished and crowded shelves read as storage, so the target is a deliberate middle: a few groups with breathing room between them. A good rule is that if you cannot name the object you bought it for, it goes.
Cost, Time and Difficulty Table for All 15 Ideas
Every idea in the guide, side by side, so you can build a plan that fits one evening or one weekend.
| # | Move | Cost | Time | Difficulty | Renter-friendly |
|---|---|---|---|---|---|
| 1 | 2,700K warm-white bulb swap, CRI 90+ | Very low | 20 min | None | Yes |
| 2 | Three-height lighting (add a floor lamp) | Low | One evening | Easy | Yes |
| 3 | One-third chandelier rule for dining | Low | 45 min | Moderate | Partly |
| 4 | One accent wall, muted depth | Low | Weekend | Moderate | No |
| 5 | Fake millwork with paint | Low to moderate | Weekend | Moderate | Partly |
| 6 | Peel-and-stick wallcovering | Low | 2-3 hrs | Easy | Yes |
| 7 | Correctly sized rug, front legs on | Low to moderate | Afternoon | Easy | Yes |
| 8 | Curtains 6-8 in above, 8-12 in wider | Very low to low | 45 min | Easy | Yes |
| 9 | Layer three textures | Low | Afternoon | Easy | Yes |
| 10 | Cabinet hardware swap | Very low | 90 min | Easy | Partly |
| 11 | One oversized mirror | Low to moderate | 20 min + sourcing | Easy | Yes |
| 12 | Anchor piece swap | Moderate | Weekend | Easy | No |
| 13 | Live plants in ceramic planters | Very low to low | 20 min | None | Yes |
| 14 | One large artwork | Low | 45 min | Easy | Partly |
| 15 | Five objects per surface | None | 30 min | None | Yes |
Read the renter-friendly column first if that is your situation. Twelve of the fifteen need no holes at all, and the three that do have a no-drill version noted above.
Designer Formulas Worth Memorizing
These are the numbers decorators actually use. They are not rules so much as shortcuts, and each one exists because it solves a proportion problem you would otherwise solve by guessing.
The 3-5-7 rule. When styling a surface like a console, a dresser top or an entryway table, aim for three objects, then five, then seven, in a visible pyramid. The rule is about visual weight grouping rather than a literal object count, so a single large vessel with a small stack beside it counts as two groups. It is the single most useful answer to “how do I style open shelving without it looking cluttered,” because it forces breathing room into the arrangement.
The 60-30-10 rule for colour. Roughly 60 percent of a room in a main neutral, 30 percent in a secondary, and 10 percent in an accent. Applied to a budget, it stops you buying a throw, a cushion and a vase in three different colours. Get the neutral right first, add the secondary from what you already own, then spend the accent on one visible item.
Rug sizing. The front legs of the front-most seating on the rug, no exceptions in a standard room. For a dining area, the rug should extend roughly 24 inches past the table on each side so chairs stay on it when pulled out.
The chandelier one-third rule. Fixture diameter at about one third of the table length. This is the single fastest way to make a dining room look professionally scaled, and it is the rule most often violated by builder-grade fixtures.
The lamp shade two-thirds rule. A shade should be about two thirds the height of the lamp base. A small shade on a tall base makes a thrifted lamp look like a clearance find, while a correctly scaled shade makes the same lamp look bought from a lighting shop.
Curtain placement. Six to 8 inches above the frame, 8 to 12 inches wider on each side, hem at the floor. There is no better return on a small budget than this one.
Renter-Friendly and No-Drill Versions
Most decorating advice assumes you own the place, which is why it is useless to a large share of readers. Every high-impact idea in this guide has a version that leaves the walls exactly as you found them, and deposits are not a design problem, they are a design constraint.
Tension rods instead of drilled rods. Push-fit and screw-down tension rods can be mounted inside a window recess, holding a proper curtain panel. Add finials from a craft store and it reads as a real rod from across the room. Run the panel as high as the recess allows, which is often the entire trick.
Removable wallcovering instead of paint. Peel-and-stick panels come in rolls, strips and full sheets, and they lift off with a steady pull and a little warm water. Test a small square in a hidden corner for 24 hours first, because adhesion varies with wall texture and paint freshness. On a textured or freshly painted wall, expect to need a surface primer or a fabric-wallcovering adhesive.
Command-style hooks and removable strips for art. Rated for the weight, they hold a framed piece. The caveat is that they work best on smooth painted drywall, not on wallpaper, textured paint or freshly painted walls, where the adhesive can lift the finish along with the hook.
Removable shelf ledges for styling. A picture-hanging ledge with removable pads gives you a place to stage objects and plants, and it comes off with the pads. Two or three at staggered heights on one wall reads as an architectural detail.
Framed art leaning instead of hanging. A large frame resting on the floor behind a sofa, or on a mantel, gives you the scale benefit of oversized artwork with no hole in the wall. Add a small removable clip and a fishline hanger if it needs to stay upright.
Painted furniture with no commitment. If you cannot paint the wall, paint or re-cover the cheapest piece you own instead. A thrifted side table in a muted green becomes a statement object, and a plain lampshade re-covered in fabric changes a thrifted lamp into a designed one.
How to Thrift Decor That Actually Looks Expensive
Thrifting is not automatically cheap-looking. A piece with real material, real hardware and real age reads as vintage, while a piece made of particle board with plastic veneer and dated wiring reads as junk no matter how little you paid. The difference is knowable before you pay, so here is how to tell.
Check the material before the style. Solid wood, solid brass, real glass and cast iron are good signs. Particle board, MDF, plastic veneer over pressboard, and hollow-core doors are not, because the edges and the back panel give them away quickly. Flip anything with a back panel. A solid piece has a finished back; a flat-pack piece has a thin printed back and screw holes.
Test the joints and the wobble. A drawer that rises when you push the front, or a chair that rocks, means the joinery has failed. You can often fix that with wood glue and a clamp, and glue is the single cheapest tool in this whole guide. A piece held together with staples or brads is usually a skip.
Look at the hardware. Screws that are slotted and rust-stained instead of Phillips and clean suggest age; screws that are flat-head Phillips and uniform suggest a 1990s flat-pack. Dated brass or bronze hardware with a living finish, which is a metal that darkens where hands touch it, is a genuine bonus rather than a flaw.
Check the wiring on lamps. Unplugged, gently tug the cord at the base. A stiff cord, cracked insulation or a cord that does not have an Underwriters Laboratories label means skip it, no matter how beautiful the shade is. The fix is a rewiring kit from an electrical supply shop, which is inexpensive and takes about an hour if you have done it before.
Assess condition, then potential. A piece needs to be cleanable, not perfect. Small dents and worn edges are the patina that makes a piece read as old rather than damaged. Water rings, sun bleaching, torn upholstery and missing hardware are repair, not character, and the repair budget should be part of the cost.
Know when to walk away. Skip anything with a smell you cannot shift, mould, structural damage to a flat-pack carcass, or a piece you would have to restore to display at all. The discipline matters, because one bad buy out of ten is what turns a thrifting trip into a money sink.
The most common piece of thrifting advice in the discussions is the same one, and it is the most useful: spray paint, wood glue, stain and a screwdriver will let you fix, make or repurpose almost anything. In r/Apartmentliving, that was the entire answer to making secondhand furniture look deliberate. In r/Frugal, the top response to the question about inexpensive items was simply to shop around the house for things you could use as decor, because rearranging what you own is free and reads calm. In r/cottagecore, the practical version was buying artwork in bundles and framing it cheaply, or printing at home.
Small Rooms, Low Ceilings and Basement Suites
Small-space advice often makes things worse, so here is the version that holds up. The rule is that you fix proportion, not size, and you never add a small item where a large one would do the same job.
Low ceilings. Hang the curtain rod as close to the ceiling as it will go, and keep tall furniture away from the wall in a low-ceilinged room. A pale ceiling colour with a matte finish reflects light and stops the ceiling from pressing down. Skip crown moulding, which draws a hard line at the ceiling and lowers it visually.
Narrow rooms. Push furniture to the longest wall, keep a clear path down the centre, and use a large mirror on the short wall to shorten the room. Avoid large horizontal furniture like a sideboard in a room under 8 feet wide; it stops the eye at both ends.
Basement suites. Ceiling height and window size are fixed, so win with light. Use a light warm white on the ceiling, add a floor lamp in the darkest corner, and hang a large mirror opposite whatever glazing there is. Peel-and-stick wallcovering is the best paint-alternative down here, since basement walls often hold moisture that makes paint adhesion patchy.
The big-rug objection. A large rug makes a small room look larger, not smaller, because it defines one continuous surface and stops the eye from tracking the floor edges. The rug that shrinks a room is the one that stops short of the furniture, because it reads as a leftover patch.
One more local note. If you are in a climate with long dark winters, budget your warm bulbs and a lamp before anything else on this list. Six months of cool-blue light will undo a great deal of good decorating.
Room-by-Room Budget Worksheet
Where to put a limited budget so it does the most work, one room at a time. The order matters: do the highest-impact row first.
| Room | Highest-impact move | Second move | Cost band | Weekend time |
|---|---|---|---|---|
| Living room | Warm bulbs plus a floor lamp | Correctly sized rug | Low to moderate | Half a weekend |
| Bedroom | Curtains high and wide | Layered bedding in two textures | Low | One evening |
| Bathroom | Cabinet hardware swap | One large framed print or mirror | Very low to low | One evening |
| Entry and mudroom | Oversized round mirror | One tray and five objects, cleared | Low | One evening |
| Dining room | Correct-scale pendant or chandelier | Layered rug under a smaller one | Low to moderate | Half a weekend |
| Home office | One large artwork or a gallery wall, same-size frames | Task lamp at desk height plus a floor lamp | Low | One evening |
If your budget covers the whole place rather than one room, work down the table in order and stop when the money runs out. Doing bulbs and curtains across the entire home first produces more visible change than perfecting a single room.
10 Things That Make a Home Look Cheap (and What to Do Instead)
This is the list nobody else writes, and it is the one that saves the most money, because the fix is often subtractive.
- Cool-white overhead light. Fix: 2,700K warm white at CRI 90+, with the ceiling light off in the evening.
- A rug that does not reach the furniture. Fix: size it so the front legs sit on it, or layer a larger flatweave under a smaller one.
- Curtains hung low, narrow and short. Fix: 6 to 8 inches above the frame, 8 to 12 inches wider each side, hem to the floor.
- Dated shiny brass or plastic cabinet hardware. Fix: matte black or aged brass, repeated across every door and drawer.
- Matching decor sets. Fix: break the set, keep one or two pieces, and mix in thrifted items with age.
- Too many small objects on every surface. Fix: five objects per surface, with empty space between them.
- Open shelving that is either packed or bare. Fix: three groups on a shelf with gaps, using the 3-5-7 pyramid.
- Flat walls with a scattered grid of small frames. Fix: one oversized piece, or same-size frames aligned on a common top line.
- Everything the same sheen. Fix: mix matte, woven, glossy and natural in the same room.
- Cheap paint over dark or glossy walls with no primer. Fix: prime first, then two coats in eggshell, and repaint the trim the same week.
Add one more that is not a purchase: treating every wall as a place for something. A blank wall is not unfinished. It is breathing room, and it is the reason the rest of the room reads as calm.
Frequently Asked Questions
How do you make your house look expensive for cheap?
Change light, scale, texture and focal point before you buy anything. Swap every bulb to 2,700K warm white at CRI 90+, add a floor lamp so the room has light at three heights, size a rug so the front legs of the seating sit on it, hang curtains 6 to 8 inches above the frame and 8 to 12 inches wider, and add one oversized mirror or one large artwork. Finish by cutting each surface down to five objects.
What is the 3-5-7 rule in decorating?
It is a surface-styling guideline: arrange objects in a visible pyramid of three groups, then five, then seven. It is about visual weight rather than a strict object count, so one large vessel with a small stack beside it reads as two groups. It is the simplest fix for open shelving that looks cluttered.
What makes a home look wealthy?
Warm layered light, correct scale, a mix of natural textures, one dominant anchor piece, and a colour or material repeated sparingly. Expensive-looking rooms are rarely the ones with the most expensive items. They are the rooms where the eye has somewhere to rest and the proportions were chosen on purpose.
What are 10 things that can make my home look cheap?
Cool-white overhead light, an undersized rug, curtains hung low and narrow, dated shiny brass hardware, matching decor sets, too many small objects, over-packed or completely bare shelving, a scattered grid of small frames, uniform sheen across every surface, and painting over dark or glossy walls without primer.
What color makes a house look expensive?
Deep, muted, slightly greyed tones such as forest green, inky blue, terracotta, warm clay and a well-chosen near-black. A warm neutral like greige, putty or warm off-white in an eggshell finish also makes trim and hardware look intentional. What matters most is depth and restraint rather than how trendy the colour is.
Do thrift store and dollar store decor pieces ever look intentional?
Yes, with conditions. The piece has to be right for the room in scale, it has to be good material with sound joinery, and it has to be one of a small number of deliberate choices rather than part of a pile. Thrifted vintage mirrors, solid wood side tables, brass lamps and heavy glassware read as curated. Cheap fabric, plastic-look sheen and mismatched sets never will.
How can I decorate a rental without drilling anything?
Use a tension rod for curtains, peel-and-stick wallcovering for a focal wall, removable adhesive hooks or strips for art on smooth painted drywall, picture-hanging ledges with removable pads for styling shelves, and a large frame leaned on the floor for oversized-art impact. If you want a colour change, re-cover a thrifted side table or a lampshade instead of the wall.
What decor trends are worth following on a budget?
Warm minimalism, layered neutrals with two or three contrasting textures, sculptural and statement lighting in a correct scale, and vintage or heirloom finds mixed with new supporting pieces. The trends that go wrong on a budget are novelty patterns and trend-matched sets, because they date fastest and read as mass retail.
Conclusion: Your One-Weekend Action Plan
Cheap home decor ideas that look expensive are not about finding secret cheap versions of expensive things. They are about fixing the four cues the eye actually judges, and every one of them is a weekend job rather than a purchase.
Here is the plan. On Saturday, buy warm-white 2,700K bulbs and swap every fixture in the home, then raise and widen one curtain rod, then clear every surface down to five objects. On Sunday, measure your seating and either get the correctly sized rug or layer a larger flatweave under what you have, then add one floor lamp and one large mirror.
That is the whole refresh, it works in any room, and none of it needs a drill. Re-read the anti-list before you buy anything else, because the cheapest way to make a home look expensive is to stop doing four or five things that make it look cheap.