
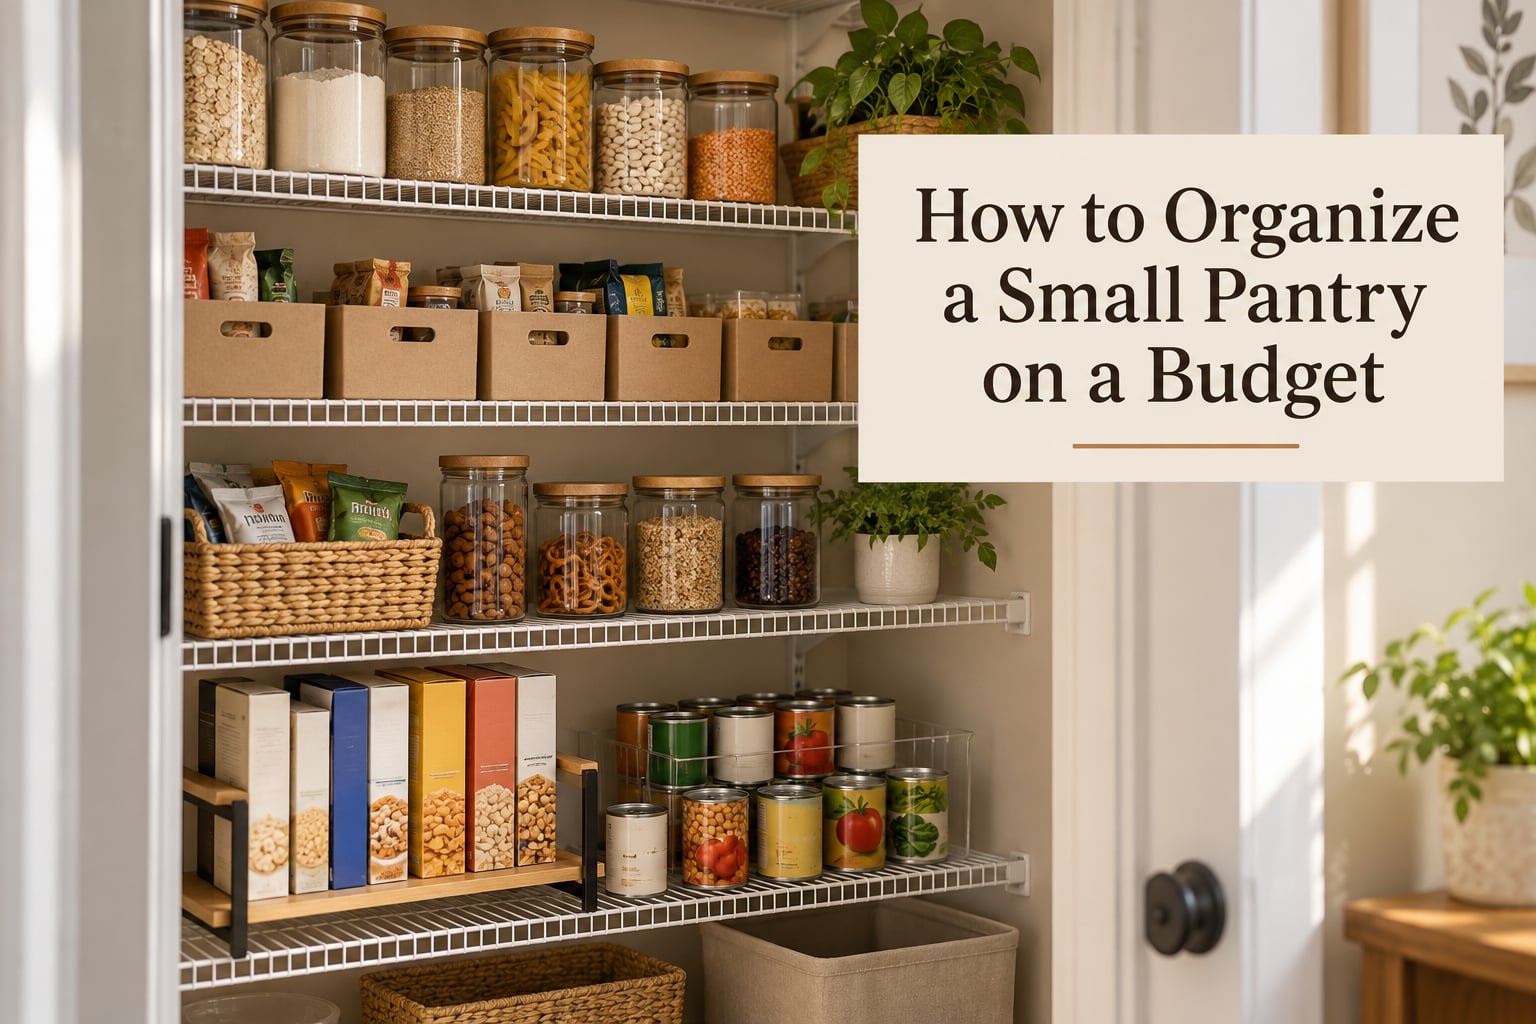
The cheapest way to organize a small pantry is to spend nothing on the first pass: empty every shelf, measure the space, group food by how you actually use it, and place items by weight and frequency. Only then buy one or two organizers for the specific problem you cannot fix with free containers, labels, and a cardboard tray.
I have done this in our own kitchen more than once, most recently in a single Saturday after a move left us with a closet-sized pantry and about three months of unopened groceries we had bought twice. What I learned is that the organizers are never the expensive part. The savings come from being able to see what you already have, using food before it turns, and not buying a fourth bag of rice because the last one was hidden behind a bin on the top shelf.
That is the whole promise of this guide. Below is the exact method, in order, with what to do at each step, what you can skip, and where a small budget actually pays off. It is written for a small or awkward pantry, not a walk-in one. If your shelves are deep and narrow, your door cannot open fully, or you rent and cannot drill, this is the version that fits.
Updated for 2026.
Table of Contents
- How to Organize a Small Pantry on a Budget: The 8-Step Method
- Step 1: Empty the pantry completely
- Step 2: Measure the shelves, not the room
- Step 3: Set a spending number and take the free-first path
- Step 4: Group food by use, not by type
- Step 5: Zone by height and weight
- Step 6: Buy only the organizers that fix a named problem
- Step 7: Label everything, including the date you decanted it
- Step 8: Keep it working with a five-minute weekly reset
- What You Can Skip Spending On: Three Pantry Budget Tiers
- The Shelf-Zone Cheat Sheet for Small Pantries
- What Should Not Be Stored in a Pantry
- Common Pantry Organization Mistakes and How to Fix Them
- Good DIY Ideas for a Small Pantry
- How to Organize a Pantry You Do Not Own
- The Free Pantry Inventory Checklist
- Frequently Asked Questions
- What is the most affordable way to organize my pantry?
- What are common pantry organization mistakes?
- What is the best way to organize a small pantry?
- What should not be stored in a pantry?
- What are some good DIY ideas for a small pantry?
- Do I need bins for my pantry?
- How do I stop buying food I already have?
- Wrapping Up Your Budget Pantry Makeover
How to Organize a Small Pantry on a Budget: The 8-Step Method
Work through these steps in sequence. Skipping ahead to the buying stage is the single most common way people overspend, because you end up with organizers for problems you do not actually have.
Step 1: Empty the pantry completely
Take everything out and put it on the floor, the bed, or the kitchen table. All of it, including the cans at the back you have not looked at since you moved in.
Now triage into four piles:
- Eat now. Anything that expires within a week goes on a list on the fridge and into meal planning this week.
- Donate. Sealed, unexpired, and something you genuinely will not eat. Unopened dry goods and unopened cans usually go to a local food bank or community fridge.
- Toss. Opened packages well past their date, anything with visible spoilage, and anything that smells off.
- Keep. What you actually use. Be honest here. If you bought two kinds of salsa and ate neither in four months, one of them goes.
Once the floor piles are sorted, wipe the shelves themselves. Food crumbs and dust are what draw pantry pests, and a clean bare shelf is also the honest test of how much room you really have. Frequently, the keep pile fits easily on half the shelves you thought you needed.
This step alone is where the money is. Expired and forgotten food is the most expensive thing in a disorganized pantry, because you paid for it once and then paid again to replace it.
Step 2: Measure the shelves, not the room
Grab a tape measure and write down four numbers for each shelf: width, depth, the gap between shelves, and the height from the shelf to the shelf above it. Also measure how far the door opens, because in many small pantries the door stops at about halfway and that space is unusable.
These numbers decide everything you buy later. A container that is wonderful in a wide pantry becomes a wasted purchase in a narrow one. Measure before you shop, and take your measurements with you in your phone.
If your shelves are vented wire, note that too. Reddit users in the r/organization thread that ranks for this query solve the same problem for free: cut a piece of cardboard to fit the shelf and lay it flat so small cans and jars stop tipping and dropping through the gaps. It costs nothing and it takes about two minutes per shelf.
Step 3: Set a spending number and take the free-first path
Decide what you are willing to spend before you go anywhere. A realistic ceiling for a genuinely small pantry is the cost of one or two ordinary grocery trips, spent over months rather than in one weekend. Once the number is written down, everything that follows is easier to judge.
Before spending any of it, inventory what you already own that can do the job:
- Glass jars from pickles, sauces, or drinks, with new lids bought in bulk or salvaged carefully from the recycling bin.
- Cardboard boxes cut down to shelf-height trays. Free, stackable, and they slide in and out easily.
- Basket handles or wire baskets from anywhere in the house, repurposed as pull-out drawers.
- Masking tape or a free printable label template instead of a branded label maker.
Most small pantries can be completely reorganized with those four things. The purchase comes later, and it should be small.
Step 4: Group food by use, not by type
Grouping by type is what makes most pantries look organized and behave badly. Group by when you use it instead, and your pantry starts to work like a grocery list.
Build these zones:
- Breakfast – oatmeal, cereal, granola, pancake mix, coffee, tea.
- Baking – flour, sugar, baking powder, chocolate chips, sprinkles, vanilla.
- Snacks and lunch pulls – the items your family actually reaches for, including kid-safe items.
- Canned goods – grouped by type so you can see how many you have of each.
- Condiments and sauces – including the partial bottles you keep meaning to use.
- Bulk dry goods – rice, pasta, beans, and the big bags that take up real space.
Two rules make the difference. Keep the duplicates visible rather than hidden, because seeing four cans of diced tomatoes is how you stop buying a fifth. And keep a “use soon” basket at eye level, so the food that expires first is the food you see first.
Step 5: Zone by height and weight
Placement rules are simple and they are worth following exactly. Heavy items go low. Daily-use items go at eye level. Rarely used items go up high. Kids get their own zone at their own height.
Weight matters for safety as much as convenience. A shelf high in a small pantry that holds canned goods is a shelf you will regret, especially in a home with small children who climb.
Depth matters too. In a deep narrow pantry, front items hide back items and that is the direct cause of duplicate purchases. Use one-bin-deep rows, or place like items in a single front-to-back line so nothing hides behind anything.
Step 6: Buy only the organizers that fix a named problem
Now, and only now, do you shop. Each item below should be tied to a specific frustration you hit while sorting in Step 1 and measuring in Step 2.
- A turntable – if you have deep shelves or awkward corner space and things keep disappearing at the back. It converts a reach into a spin.
- A tiered shelf riser – if your shelf spacing is tall and you are wasting the gap above short items. One riser can add a usable shelf to an entire level.
- A stackable can rack – if cans are toppling or rolling. A simple two- or three-tier rack fixes vertical use of a deep shelf.
- An over-door rack – if you have a full-length door and thin items like foil, plastic wrap, spices, or flat boxes.
- Airtight containers for bulk dry goods – if you buy flour, rice, or beans in bulk. Airtight storage is what keeps pantry pests out, more than any cleaning routine does.
- Shelf boards or pull-out baskets – if you want one-bin-deep access on deep wire shelves.
The over-buying mistake is real and common. People come home with twenty organizer pieces and end up using three. Over-buying organizers is itself a budget failure, because the money came out of the same envelope as groceries.
Step 7: Label everything, including the date you decanted it
Labels are the cheapest organizing tool there is. A handwritten strip of masking tape, or a sheet of free printable labels on plain stock, does the job perfectly well.
Write two things on every container: what it is, and when you filled it. That second line matters most when you have decanted dry goods into a shared container, because the moment you move pasta out of its factory bag you lose the original date and the best-before information.
Free printable label templates beat store-bought label packs for pantry stock, because pantry items are personal. Most label packs are sized for kitchen canisters, not for a goji berry bag or a seven-grain baking mix. Stock items in your actual pantry, print them, and skip the packaged set entirely.
Step 8: Keep it working with a five-minute weekly reset
A pantry that works for six weeks and then collapses needs a smaller maintenance habit than a pantry that works for a year. Pick a fixed day and set a timer for five minutes.
Put away strays, restock the zones you emptied, and check the use-soon basket. Rotate stock using first in, first out: when you refill, move the newer item to the back and the older one to the front. Every quarter, do a quick inventory against your list and adjust what you buy.
If you buy the same item more than once after inventorying, the problem is the list, not the shelves. Write the list where you can see it before you shop.
What You Can Skip Spending On: Three Pantry Budget Tiers
Search results for this topic span impulse bins at a few dollars each through premium modular systems many times higher. Here is how to match your spend to your actual problem. All three tiers use the same eight steps; the difference is only what you buy.
Tier one, the no-cost tier: everything is jars, boxes, cardboard shelf liners, and hand-written labels. You get sorted, visible, and zoned storage with zero new purchases. For most small pantries, this is genuinely enough, and it is the tier this guide is built around.
Tier two, the one-problem tier: pick the single frustration from Step 6 and buy the one organizer that fixes it. Often a pair of shelf risers, often a single turntable for a deep corner. You get one real improvement instead of a matching set you will half use.
Tier three, the full refresh tier: a consistent set of containers, risers on every shelf, and can racks, for a pantry that is genuinely under-capacity. Worth it only when measuring showed you were out of room, not merely out of order.
The honest test for tier three: if the keep pile from Step 1 fits comfortably on your existing shelves, you do not need it. Redistributing beats buying.
The Shelf-Zone Cheat Sheet for Small Pantries
This is the placement map to keep beside you while you work. Every competitor that covers pantry placement does it in prose, so it is worth having as a scannable reference.
- Top shelf: rarely used and light – baking supplies, seasonal baking overflow, holiday-only items, lightweight bulk goods like snack crackers. Nothing you need weekly belongs up here.
- Second from top: light but occasional – breakfast items you use on weekends, canned goods, condiments, and the overflow from a bulkier zone below.
- Eye level: daily use, one-bin deep – breakfast, lunch pulls, the use-soon basket, and the items that stop duplicate purchases by being visible.
- Below eye level: heavier daily items like cans and jars, plus anything a child should not reach.
- Bottom shelf: heaviest and least used – bulk dry goods, water cases, canned goods, refill items, pet food kept in a lidded container.
- Kid height: a dedicated low band with snacks and lunch items in a handled basket they can pull out themselves, rather than climbing.
- Door back: flat, light, tall items – foil, wrap, pouches, and spice packets – fitted with an over-door rack only if the door opens fully.
Two rules sit underneath all of it. Never mix a heavy item at eye level with a light one, because the shelf reads wrong and the wrong thing gets grabbed. And never hide a category behind another category, because hidden food is wasted money in slow motion.
What Should Not Be Stored in a Pantry
A pantry is for shelf-stable, unopened or properly sealed food. A surprising amount of what ends up in a small pantry does not belong there, and the crowd-in effect of a small pantry makes mistakes worse.
- Refrigerated perishables – dairy, fresh meat, leftovers, cut produce, and anything perishable. A pantry is not a second fridge.
- Opened items that need refrigeration – opened oils, jarred sauces, and condiments go back in the fridge once opened, in a sealed container.
- Medicines and supplements – humidity and temperature swings in a pantry shorten shelf life, and a pantry is not child-resistant storage.
- Cleaning chemicals and anything a child could reach – a pantry door is often unlocked and at child height.
- Pet food, in an open bag – it belongs low and sealed, because insects and rodents find open pet food quickly.
- Fresh bread and bakery items – they go stale fast and attract mould in a closed space.
- Bulk dry goods in open bags – flour, rice, and cereal stay fresh and pest-free only in airtight containers.
One more caution: if you decant dry goods into shared containers, label for allergens. Someone reaching into a shared “baking” jar should be able to tell whether it contains flour, powdered sugar, or something else entirely.
Common Pantry Organization Mistakes and How to Fix Them
These are the mistakes that show up again and again, in our own pantry and in the ones people describe online. Each one has a one-line fix.
- Buying organizers before measuring. Fix: tape measure first, phone in hand at the store.
- Over-buying organizers. Fix: buy one item for one named problem, then live with it a month before buying the next.
- Decanting everything into matching canisters. Fix: decant only what stays airtight in a jar, and only the items you buy in bulk.
- Labelling without a date. Fix: write the fill date beside the name on every container you fill yourself.
- Buying food you already have. Fix: keep a written inventory where you can read it before shopping.
- Mixing weights on one shelf. Fix: heavies below, lights above, no exceptions.
- Forgetting kids and pets. Fix: a low, handled snack basket at kid height and a sealed bin for pet food at the bottom.
- Letting it go for months. Fix: a five-minute reset on a fixed day, with a timer, no exceptions.
- Aesthetic-only organization. Fix: organise for the household you have, not the kitchen you saw online. Matching canisters in a house with four kids and a dog is decoration you cannot afford.
Good DIY Ideas for a Small Pantry
These cost nothing or nearly nothing, and they are the ideas that make a small pantry work harder.
- Cardboard shelf liners. Cut to size and lay flat on vented wire so small items stop falling through. This is the single most popular fix in pantry advice threads, because it solves a real problem for the cost of a recycling bin.
- Shelf risers from wood cuts. A few short lengths of timber, sanded and stacked, make a two-tier level for cereal boxes and cans.
- Tension-rod shelving. Rods wedged under an existing shelf add a whole extra level with no tools, no screws, and no wall damage.
- Over-door storage without drilling. Hook racks and hanging baskets on the back of the door, kept shallow enough that the door still closes.
- Peel-and-stick shelf liner. One strip of liner on a bare wire shelf stops cans from rolling and wipes clean.
- Hand-written labels. Masking tape and a marker, dated on the day you fill the container.
- Pull-out trays from cereal boxes. Cut the ends off a spare box and you have a drawer tray for packets and sachets.
- Zero-cost decor. A strip of leftover wallpaper on the back wall of each shelf makes a small pantry look finished without costing anything.
How to Organize a Pantry You Do Not Own
Renters and apartment dwellers usually have the hardest version of this problem, because the shelving is often builder-grade wire and you cannot patch walls. Everything above works, but these are the pieces that specifically avoid making holes.
- Tension-rod shelving for added levels with zero wall damage.
- Adhesive clips and over-door racks instead of screwed-in door shelving.
- Free-standing shelving units if your pantry has a wall you can lean against without securing.
- Cardboard and jars for all storage so nothing needs to be fixed to anything.
If your door cannot open fully, stop fighting the back of the door and skip door storage entirely. Use the shallow strip of wall beside the door frame if there is one, or plan your zones so nothing lives in that unreachable gap. Measuring first is how you find out.
The Free Pantry Inventory Checklist
Print this or copy it into a notes app. Update it after every shopping trip, and check it before you buy anything.
Shelf and zone
- Canned goods: ______ (count of each type you want to keep stocked)
- Bulk dry goods: flour, sugar, rice, pasta, beans
- Breakfast items: ______
- Baking supplies: ______
- Snacks and lunch pulls: ______
- Condiments: ______
Use-soon list – anything expiring this month that must get used first
Do not buy again – the list that stops duplicate purchases. Anything already on this list, you do not buy until it is gone from the pantry.
Keep it in three places if you can manage it: your phone, the fridge door, and a copy in your shopping notes. The copy in your shopping notes is the one that does the work.
Frequently Asked Questions
What is the most affordable way to organize my pantry?
The cheapest path is the one that spends nothing: empty every shelf, sort out expired and duplicate food, measure the space, group items by how you use them, and place them by weight and frequency. Use jars, boxes, and cardboard you already have, plus hand-written labels, before buying anything. Only then spend on the one organizer that fixes a problem you can name, such as a turntable for a deep shelf or a riser for wasted vertical space.
What are common pantry organization mistakes?
The most common mistakes are buying organizers before measuring, over-buying organizer pieces and then using only a few, decanting every item into matching canisters, and labelling containers without the date you filled them. Others are buying food you already have, mixing heavy and light items on the same shelf, and ignoring kids and pets when placing snacks and pet food. Each has a simple fix, and the order of the eight steps above prevents most of them.
What is the best way to organize a small pantry?
Group food by when you use it rather than by type, keep only one row deep so nothing hides at the back, and place it by weight and frequency. Heavy and rarely used items go on the bottom shelf, daily items sit at eye level, and kids get their own low basket at their height. Light rarely used items go on top, and flat items live on the back of the door if it opens fully.
What should not be stored in a pantry?
Do not store refrigerated perishables, dairy, fresh meat, leftovers, or cut produce in a pantry. Opened oils, sauces, and condiments go back in the fridge. Keep medicines and supplements out because humidity shortens their shelf life, and keep cleaning chemicals away from a door a child can open. Pet food belongs low in a sealed bin, fresh bread goes stale in a closed space, and bulk dry goods need airtight containers.
What are some good DIY ideas for a small pantry?
Cut cardboard to lay flat on vented wire shelves so small cans and jars stop tipping and falling through. Stack short timber lengths under an existing shelf to make a two-tier riser, and wedge tension rods under a shelf for a whole extra level with no tools and no wall damage. Hand-write labels on masking tape, cut spare cereal boxes into packet trays, and line wire shelves with peel-and-stick liner so cans stop rolling.
Do I need bins for my pantry?
No. Bins are a solution to specific problems, not a starting requirement. A small pantry can be organized entirely with glass jars, cut-down cardboard boxes, and baskets repurposed from elsewhere in the house. Buy a bin only when you have named the problem, such as deep shelves where items vanish at the back, or a category that keeps spilling. Matching canisters in particular buy appearance rather than function.
How do I stop buying food I already have?
Keep a written pantry inventory and check it before you shop, not after. List what you are fully stocked on, keep a separate use-soon list for anything expiring this month, and put those items at eye level so you see them first. When you refill, rotate stock with first in, first out, moving the newer item to the back. Restocking a category you already have three of is the most common duplicate buy.
Wrapping Up Your Budget Pantry Makeover
To organize a small pantry on a budget, do the eight steps in order and stop yourself from buying anything until the first seven are finished. Empty the shelves, measure them, group food by use, and place it by weight and frequency. That work is what actually saves money, because visible food gets used and duplicates stop being bought.
Spend afterwards, and spend on one named problem at a time. Add a five-minute weekly reset and a written inventory list, and the pantry keeps working long after the weekend is over. Start today with the clear-out: it costs nothing and it is the step that changes everything else.