
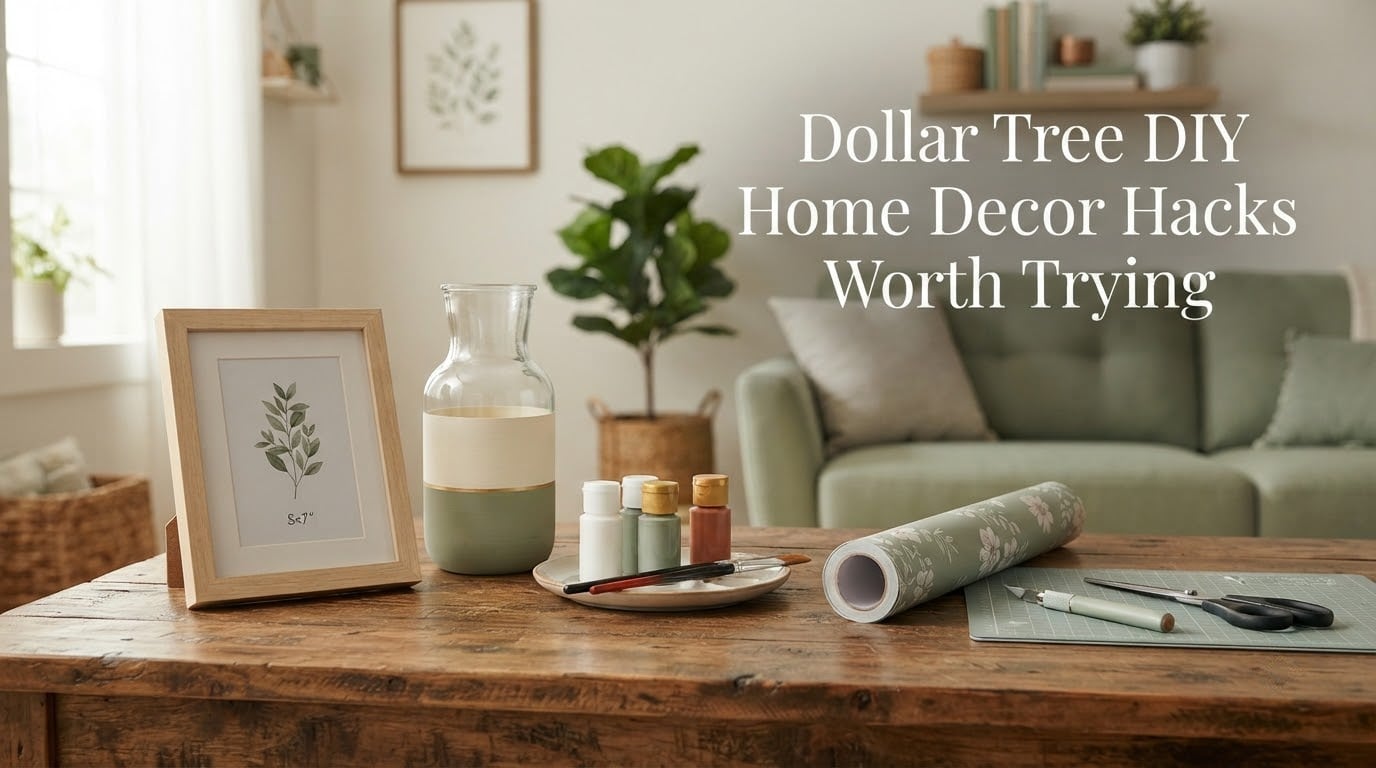
The best Dollar Tree DIY home decor hacks take one or two plain store items, add a finish most people skip, and end up looking like a designer piece rather than a dollar-store find. The four finish treatments that do all the work are paint over primer, peel-and-stick vinyl or contact paper, added texture, and generous scale. Pick a small number of colours, repeat them across the room, and a handful of cheap frames and vases stop reading as bargain-bin pieces.
I run these projects in our own house, in a rental, and in friends’ places, and the pattern never really changes: the craft is almost never the hard part. Skipping the finish step is. A raw Dollar Tree frame looks like a Dollar Tree frame. The same frame, sanded, primed and painted in a colour you pulled from your curtains, looks like a purchase from a boutique you would never walk into.
So what makes a hack worth trying in 2026? I use four filters. The project should need one or two store items. The extras should be things you already own or can pick up in a single cheap run. The time should stay under half an hour for most people. And nothing should require you to paint a wall, drill into something permanent, or commit to a trend that will look dated in a year.
Everything below passed those filters. I have also flagged the things I would not bother with, because the failures are as instructive as the wins, and the bargain bin is full of items that quietly need a skill you do not have yet.
A note on shopping reality before we start: not everything is a flat single digit any more. Price increases have pushed some seasonal pieces higher, and forum shoppers regularly post the exact figure they paid for a haul, including the ones that surprised them. Plan on spending a few dollars on a finished hack rather than a single coin, and the math still comes out ahead of anything comparable in a big-box decor aisle.
Table of Contents
- The 10 Dollar Tree DIY Home Decor Hacks Worth Trying First
- How to Make Dollar Tree Decor Look Expensive: The Four Levers
- Before You Shop: Must-Have Aisle Items, Timing and a One-Time Supply Run
- Wall Decor Hacks That Pass the Worth-It Test
- Vase, Jar and Tray Hacks
- Furniture and Hardware Hacks
- Kitchen, Bathroom and Organization Hacks
- 5-Minute Hacks for Renters That Leave No Marks
- Seasonal Hacks: Fall, Halloween, Christmas and Spring
- Every Hack at a Glance: Time, Skill and What It Takes
- What Not to Buy at Dollar Tree (and What to Use Instead)
- Frequently Asked Questions
- What are some of the best DIY projects I can do at Dollar Tree?
- What are some of the best Dollar Tree hacks right now?
- What day of the week should you not shop at Dollar Tree?
- What are some must-have items from Dollar Tree?
- What are some popular new Dollar Tree items to look for?
- What Dollar Tree items are going viral?
- What are some cheap DIY decor ideas?
- What is the 3-5-7 rule in decorating?
- Conclusion
The 10 Dollar Tree DIY Home Decor Hacks Worth Trying First
These are the ones I send to friends who say they have no time and no craft ability. Each one is a single evening at most, and every one of them works in a small space.
- Primed and painted picture frames. Remove the backing and glass, sand the mitres, prime, then two coats of the same paint you use on your walls. Cost: a few dollars for primer and paint. Time: 25 minutes plus drying.
- Peel-and-stick vinyl traced from a real object. Peel a leaf, a scrap of wallpaper, or the edge of a tile and transfer the pattern onto a plain frame or board. No tracing skill needed. Time: 20 minutes.
- A gallery wall from thrifted frames. Buy a handful of frames in one wood tone, paint them all the same colour, and hang an odd number in a tight grid. Time: 45 minutes for five frames.
- Glass vases with a painted base. Tape a clean line, sponge-brush a block of colour on the bottom third, and add faux stems. Time: 15 minutes plus drying.
- Shower curtain rings turned into curtain hardware and hooks. Paint them one colour, screw them into a board you already own. Time: 30 minutes including drying.
- A faux-tiled backsplash from peel-and-stick squares. Lay a masking-tape grid on the wall, stick on the tiles, pull the tape. Renter friendly. Time: one evening.
- A cutting board turned into a wall sign. Stencil or paint a word directly on the wood, add two D-rings, hang it over the stove or a console table. Time: 30 minutes plus drying.
- Storage bins with peel-and-stick labels. Skip the printing, stick on plain vinyl rectangles, and write the label in one pen style. Time: 15 minutes.
- A lamp base sprayed in a room colour. Take the shade off, mask the cord, spray outside on a drop cloth. Read the can and keep the windows open. Time: 20 minutes plus drying.
- Faux greenery in a painted pot. Paint a plain pot, drop in stems, repeat the same pot style in three sizes. Time: 25 minutes.
If you only try three, make them the frames, the painted vase, and the peel-and-stick tile. Between them you cover all four finish levers, and you end up with a coordinated set rather than three unrelated objects.
How to Make Dollar Tree Decor Look Expensive: The Four Levers
Budget home decor reads as cheap for four specific reasons, and each one has a matching fix that costs very little. Understanding the levers is what separates a room that looks assembled from a room that looks considered.
1. Paint over primer, always
Unfinished Dollar Tree wood is porous and thirsty, and paint applied straight onto it bubbles, streaks and peels within weeks. Primer is the single highest-return purchase in this whole hobby. It costs a few dollars, it makes two thin coats behave like one, and it is the difference between decor that lasts a season and decor that lasts a decade.
2. Surface change with peel-and-stick vinyl or contact paper
A flat MDF board is the reason cheap wall pieces look mass-produced. Covering it in peel-and-stick vinyl, contact paper, or even a strip of fabric sealed with a matte top coat changes the surface reflection, which is what the eye reads as quality. A matte finish always looks more expensive than gloss, because gloss highlights every flaw underneath.
3. Texture in layers
Two or three textures on the same object look like a design decision, because the eye reads the variation as intention. Dry brushing, sponging, a stencil, and a sanded edge combined on a single board do this for nothing but time.
4. Scale and repetition
Repetition is the fourth lever, and it is the one people miss. A room with four different blues does not look coordinated. A room with the same blue on a frame, a vase, and a hook, plus one warm accent, looks styled. Group things in odd numbers, three or five rather than two or four, and keep a deliberate gap of empty wall so the group has room to breathe.
Before You Shop: Must-Have Aisle Items, Timing and a One-Time Supply Run
Beginners lose most of their budget not at the store but at the craft aisle, buying the wrong adhesive or discovering halfway through a project that they do not own a brush. Two habits fix most of that: shop at the right moment, and buy your supplies once, deliberately.
When to go, and which day to avoid
Delivery days differ by location and move around, so the useful rule is a relative one. Fresh seasonal bins tend to appear the day after a delivery, and the best pieces get picked over fast, especially faux florals, picture frames, and the better glassware. The practical habit our household uses: check the store’s delivery schedule or ask a manager, then go two or three days after a delivery rather than on the weekend. Mid-week afternoons give you the best chance of walking into something new rather than the dregs of a display. Seasonal and holiday bins appear in waves, so if you miss a wave, another one usually follows.
Must-have aisle items to look for
- Plain wooden frames in a single colour, without matting or backing
- Glass vases and jars in a few different heights, no decoration
- Unfinished wooden cutting boards, small and medium
- Shower curtain rings, plain metal, in a single finish
- Plain storage bins and small baskets in neutral colours
- Peel-and-stick tiles, vinyl rolls, and contact paper in one neutral tone
- Unfinished furniture knobs and door handles
- Plain lamps with a simple base and a neutral shade
Members of Dollar store craft groups on Facebook share hauls of the finds that beat expectations, including glass containers for food storage and small hardware items that nobody thinks to look for. The pattern in those hauls is consistent: the boring aisle beats the seasonal aisle for real decorating value.
The one-time supply run
Buy these once, outside the dollar store, and you can make a dozen hacks without another craft purchase. A can of primer, a small tray of acrylic paint in your chosen colours, sponge brushes, cheap detail brushes, medium and fine sandpaper, a strong craft adhesive for rigid surfaces, a clear matte top coat, painter’s tape, miter shears or a small hand saw, and a handful of picture hooks and removable strips.
On adhesive, one warning: hot glue is fine for attaching small embellishments, and it is genuinely wrong for anything that will hold weight or face heat. A rigid-surface adhesive holds glass to wood and will not go soft near a kitchen tile or a sunny windowsill. Use the strong adhesive for structure and hot glue for details.
We are in Alberta, so timing follows our weather rather than the calendar. A late-September run sets you up through Halloween and Christmas, and the deep-winter months are the best time to make everything at once, because pieces painted in January are ready when spring arrives. That kind of planning is how we keep a whole year of projects inside a tight budget here.
Wall Decor Hacks That Pass the Worth-It Test
Wall decor is where most people start, and it is also where the difference between cheap and expensive-looking is most visible. The rule for the whole room: pick a wall, decide the palette in two colours plus one accent, and make every piece on that wall come from that palette.
Restyle a plain frame
Remove the backing and glass, sand the frame lightly, especially the mitres, then prime and paint in two thin coats. Mask the inner edge with painter’s tape if you want a crisp line, and let the second coat dry fully before you reassemble. A detail brush is worth the extra two dollars here: it lets you paint the narrow bead moulding without bleeding onto the wall behind.
Trace and transfer a peel-and-stick pattern
This is the highest-impact hack for the least skill. Peel a leaf, a piece of scrap wallpaper, or a tile edge, stick it face down on your frame or board, then rub the back firmly with a burnisher or the back of a spoon. Peel the sample off slowly and the pattern stays. Cut to the line with a craft knife on a cutting mat, and press it down with a squeegee or a credit card for an even bond.
Build a gallery wall from thrifted frames
Buy five frames in one wood tone, paint them all the same colour so the collection reads as one object, and hang them in a tight grid with consistent spacing. Tight grids look more designed and more expensive than scattered arrangements, and equal gaps matter more than perfect centring. Paper templates cut from kraft paper let you test the whole layout on the wall before a single hole goes in.
Oversized pieces for small rooms
Scale is the cheapest design move available. A small frame hung alone above a wide console looks undersized and apologetic. One large piece in the same spot looks deliberate. When you cannot find a large piece, group three smaller ones tightly and treat them as a single object.
Vase, Jar and Tray Hacks
Glass is the most underrated bargain material, because the shape is usually lovely and the price is usually low, yet the decoration applied in the box is what dates it. Removing that decoration is most of the work.
Painted bases
Tape a level line around the lower third of a vase, sponge-brush on colour, and pull the tape while the paint is still slightly damp. Dry-brush upward with a nearly dry brush for a soft fade. Thin your paint with a little water for the second coat, and a hair dryer on cool moves it along.
Mod podge and paper
Decoupage a jar or vase with scrap wrapping paper, a scrap of fabric, or a pressed leaf. Mod Podge in thin coats, not one thick one, and let each coat dry before the next. Finish with a matte top coat, because gloss decoupage looks plastic and immediately undercuts the whole project.
Faux-tiled trays
Line a Dollar Tree tray or a thrifted wooden tray with peel-and-stick vinyl cut slightly larger than the base, then add a thin grout line with a marker or a fine brush for a stone-look effect. Seal with a matte top coat so hot dishes do not mark it.
Furniture and Hardware Hacks
Hardware is where a cheap piece of furniture instantly looks upgraded, because the eye reads metal weight as expense. Replacing a set of plain knobs is a ten-minute job and changes the perceived quality of the whole piece.
- Drawer pulls and door handles. Measure the screw spacing before you buy, and take one of the old ones to the store to match. Painting existing hardware is cheaper and works fine as long as you clean the grease off first.
- Furniture stencil. Mask, sand lightly, prime, then stencil with a stippling brush for texture that does not look printed. Seal the finished piece with a furniture-safe top coat, especially on a table that gets elbows and mugs.
- Lamp base. Remove the shade and bulb, mask the cord and socket with tape and a plastic bag, spray outside on a drop cloth, and let it cure fully before reassembling. Overpainting the shade rim with one extra coat ties the whole lamp together.
Kitchen, Bathroom and Organization Hacks
These are the hacks with the highest daily payoff, because you see them every single day rather than once a year.
- Peel-and-stick backsplash. Lay masking tape in a grid, stick on the tiles, and pull the tape while the backing paper is still going on. Work in small sections so the adhesive does not fight you. A matte finish reads as tile; a glossy finish reads as plastic.
- Vinyl-labelled bins. One sheet of plain vinyl and one pen style beats printed labels. Stick them on the short face, not the front, so the bins stack cleanly.
- Bathroom shelf risers. Paint a plain riser one colour and keep every bottle in it the same tone. Sorted and colour-matched beats storage you have to hunt through.
- Sink strainer and kitchen hardware swaps. Swap mismatched strainers, cabinet pulls, and pot hooks in a single pass. Everything in one finish makes a tired kitchen look deliberate.
- Framed weekly menu board. Paint a thrifted frame, add a strip of cork or painted board inside, and put it where you will actually see it. Change it weekly and it becomes a habit rather than decor.
5-Minute Hacks for Renters That Leave No Marks
These are the ones I use most, because they work in a rental and come down cleanly at the end of a lease. No paint on walls, no drilled holes, no adhesive residue, no deposit deductions.
- Removable strips for lightweight frames. Follow the weight limits on the packaging and use two strips per corner, not one.
- Tension rods for a no-drill curtain or a hanging herb rack. Works in a window, a shower, or a laundry alcove.
- Peel-and-stick panels on a removable board. Rather than sticking vinyl to a rented wall, cover a thrifted board and lean it.
- A gallery wall held up by a single removable picture rail. Swap individual frames without touching the wall again.
- Washi tape on a mirror to zone a small entryway. Cheap, zero commitment, and it reads as a deliberate graphic.
Two renter rules from experience. Test any removable strip on an inconspicuous corner for 24 hours before you trust it with a frame, and never put a decal on a wall that has been painted recently, because fresh paint holds adhesive far more strongly than cured paint.
Seasonal Hacks: Fall, Halloween, Christmas and Spring
Seasonal decor is where dollar store projects fail most often, because a thin plastic bin in a warm entryway cracks after one Edmonton winter and looks worse in February than looking at nothing. The fix is to spend a few dollars per piece on something rigid.
Fall and Halloween
Skip the plastic jack-o-lanterns. Build from wood and paper instead: a plain cutting board with a painted pumpkin or leaf, a thrifted frame with peel-and-stick vinyl leaves, a painted pot with faux stems, and a stenciled board sign. These survive storage and read as intentional, not disposable. Mums, dried corn, and real branches from a cleanup pile do more seasonal work than most store decor, and they cost nothing.
Christmas
Glass ornaments, plain frames painted white, wooden stars, and thrifted picture frames covered in fabric all survive from year to year. For a tree skirt or a table runner, a thrifted fabric remnant is cheaper and softer than anything seasonal in the store. A painted wood sign reading a single word in block letters does more work on an entryway console than a large plastic arrangement.
Spring and Easter
Wooden eggs painted in a tight three-colour palette, a thrifted frame with peel-and-stick floral paper, and a painted pot with early stems give you a spring display that goes back in the box and comes out next year. Fabric-covered eggs last; dye and glitter do not, because they shed onto everything in storage.
What is trending hardest right now is the transformation format, the before-and-after of a plain item turned into something that looks far more expensive, usually shown in about fifteen seconds. It works because it shows the finish step clearly, which is the part tutorials usually skip.
Every Hack at a Glance: Time, Skill and What It Takes
Nothing in the table below uses a finished decor item. Every entry starts from a plain store piece and a small supply.
| Hack | Dollar Tree item | Extra supplies needed | Time | Skill | Room |
|---|---|---|---|---|---|
| Painted frames | Plain wooden frames | Primer, paint, sandpaper, detail brush | 25 min plus drying | Beginner | Living room, hallway |
| Vinyl-traced art | MDF board or frame | Peel-and-stick vinyl, craft knife, burnisher | 20 min | Beginner | Any wall |
| Gallery wall | Five frames, one tone | Primer, paint, paper templates, hooks | 45 min | Beginner | Living room, bedroom |
| Painted vases | Plain glass vases | Paint, sponge brush, painter’s tape | 15 min plus drying | Beginner | Dining, entryway |
| Decoupaged jars | Glass jars | Mod Podge, paper, matte top coat | 20 min plus drying | Beginner | Kitchen, bathroom |
| Vinyl tile backsplash | Peel-and-stick tiles | Masking tape, squeegee, utility knife | One evening | Beginner | Kitchen |
| Wall sign | Cutting board | Paint, stencil or vinyl letters, D-rings | 30 min plus drying | Intermediate | Entryway, kitchen |
| Hardware swap | Knobs and door handles | Screwdriver, painter’s tape, drill | 10 min | Beginner | Whole house |
| Sprayed lamp | Plain table lamp | Spray paint, drop cloth, tape | 20 min plus drying | Beginner | Bedroom, reading nook |
| Bin labels | Plain storage bins | Vinyl rectangles, marker | 15 min | Beginner | Pantry, bathroom |
| Faux greenery pot | Plain pot, faux stems | Primer, paint, floral foam | 25 min plus drying | Beginner | Entryway, porch |
| Fabric frame | Thrifted frame | Fabric, rigid adhesive, matte top coat | 30 min | Intermediate | Bedroom, nursery |
Read that table as a plan rather than a list. Pick the paint projects for one evening, do them all in the same colour, and the room will look coherent before you have made a single statement piece.
What Not to Buy at Dollar Tree (and What to Use Instead)
This is the section that saves the most money, because these are the items that look promising on the shelf and fail in your hands. Every one of them has a cheap, reliable swap.
1. Their glue guns
The cheap design makes them impractical and, in some cases, unsafe to use, and the failure is usually heat management rather than glue strength. Buy a real glue gun once from a hardware or craft store. It will outlive many projects and it will not drip or slump as badly on larger beads.
2. Warped and hollow unfinished wood
Check end grain and the centre of the board before you buy. If the piece is cupped, warped, or weighs almost nothing for its size, the paint job will amplify every flaw instead of hiding it. Bowed boards cannot be flattened, so skip them entirely.
3. Flimsy frames with thin mouldings
A frame with a delicate profile cannot be painted without losing the detail, and a wide flat frame is a better canvas. Choose a frame with a flat face and a solid back. Skip anything with a hinged stand you will never use and a mitre you cannot sand flush.
4. One-season seasonal bins
Thin plastic decorations warp in heat, crack in cold, and always look tired by the third year. A few dollars spent on wood, glass, or fabric at a thrift store produces something you keep for a decade, and thrift stores here are full of exactly the frames, boards, and vases these hacks call for.
5. Paint, primer, and brushes at the dollar store
Thin craft paint does not cover and dollar store brushes shed. Buy paint and brushes once, properly, at a hardware or paint store, and spend your dollar store budget on the objects instead of the medium.
6. Anything you need to assemble with more than four screws
Flat-pack furniture at that level usually comes with missing or mismatched hardware and a particle board carcass that will not hold a drawer pull. If the project needs a full afternoon of disassembly before you can start painting, buy a thrifted solid-wood piece instead.
The overall test is simple. If a hack needs a tool you do not own, a skill you have not learned, or a material that will not survive one Edmonton winter, it is not worth trying yet. Put it back, and come back to it when the basics are in place.
Frequently Asked Questions
What are some of the best DIY projects I can do at Dollar Tree?
The best results come from simple finish jobs on plain items: painted frames, peel-and-stick vinyl traced onto MDF boards, painted vase bases, and labelled storage bins. Each uses one or two store items plus primer, paint or vinyl you already own. Frames and painted vases are the easiest place to start.
What are some of the best Dollar Tree hacks right now?
The hacks currently working hardest are transformation projects that show the finish step clearly: sand and prime before painting, matte top coats over decoupage, and peel-and-stick vinyl traced from real objects. Colour coordination is the other trend, with pieces repeated across a room in two colours plus one accent rather than a wide mix.
What day of the week should you not shop at Dollar Tree?
Avoid the days right after a delivery, when popular seasonal bins get picked over within hours. Because delivery schedules vary by location, check or ask about your store’s schedule and plan a visit two or three days later. Mid-week afternoons are your best odds of finding something new rather than leftovers.
What are some must-have items from Dollar Tree?
Plain wooden frames in one tone, undecorated glass vases and jars, unfinished cutting boards, plain metal shower curtain rings, neutral storage bins, peel-and-stick tiles, and unfinished cabinet hardware. The boring home aisle outperforms the seasonal aisle for real decorating value, because these items get painted and reused every year.
What are some popular new Dollar Tree items to look for?
Peel-and-stick tiles and vinyl in more neutral, matte finishes have become the most useful new finds, along with better-quality glassware and hardware. Seasonal bins now arrive in several waves rather than once, so a missed delivery does not mean missing the season entirely. Expect prices above a single digit on larger seasonal items.
What Dollar Tree items are going viral?
Short before-and-after transformations of plain items are the format spreading fastest, usually shown in under a minute with the finish step front and centre. The other repeated hits are wood and glass rather than plastic, which is the shift most people copied. Cheap hardware and cutting boards get reused far beyond decor.
What are some cheap DIY decor ideas?
Vinyl-traced boards, painted vase bases, decoupaged jars with scrap paper, and hardware swaps on thrifted furniture all cost only the store item plus supplies you already own. Paint the pieces in one shared colour so the group reads as a set. Skip the store’s craft paint, which rarely covers well.
What is the 3-5-7 rule in decorating?
The 3-5-7 rule is about grouping decor in odd numbers rather than pairs or fours, with about three small, five medium, or seven items in a cluster. Odd groupings look intentional because the eye reads the empty space around them as a design choice. The same logic applies to colour, with three coordinated colours working better than a full palette.
Conclusion
Dollar Tree DIY home decor hacks are worth trying when the item is plain, the finish step is not skipped, and the whole project fits in one evening. Prime before painting, change the surface with vinyl or paper, add two textures instead of one, and repeat the same colour across the room. Buy paint, brushes and adhesive once, properly, and spend your store budget on the objects. Skip the glue guns, warped wood, flimsy frames and plastic seasonal bins, and start with one painted frame and one painted vase in the same colour.