
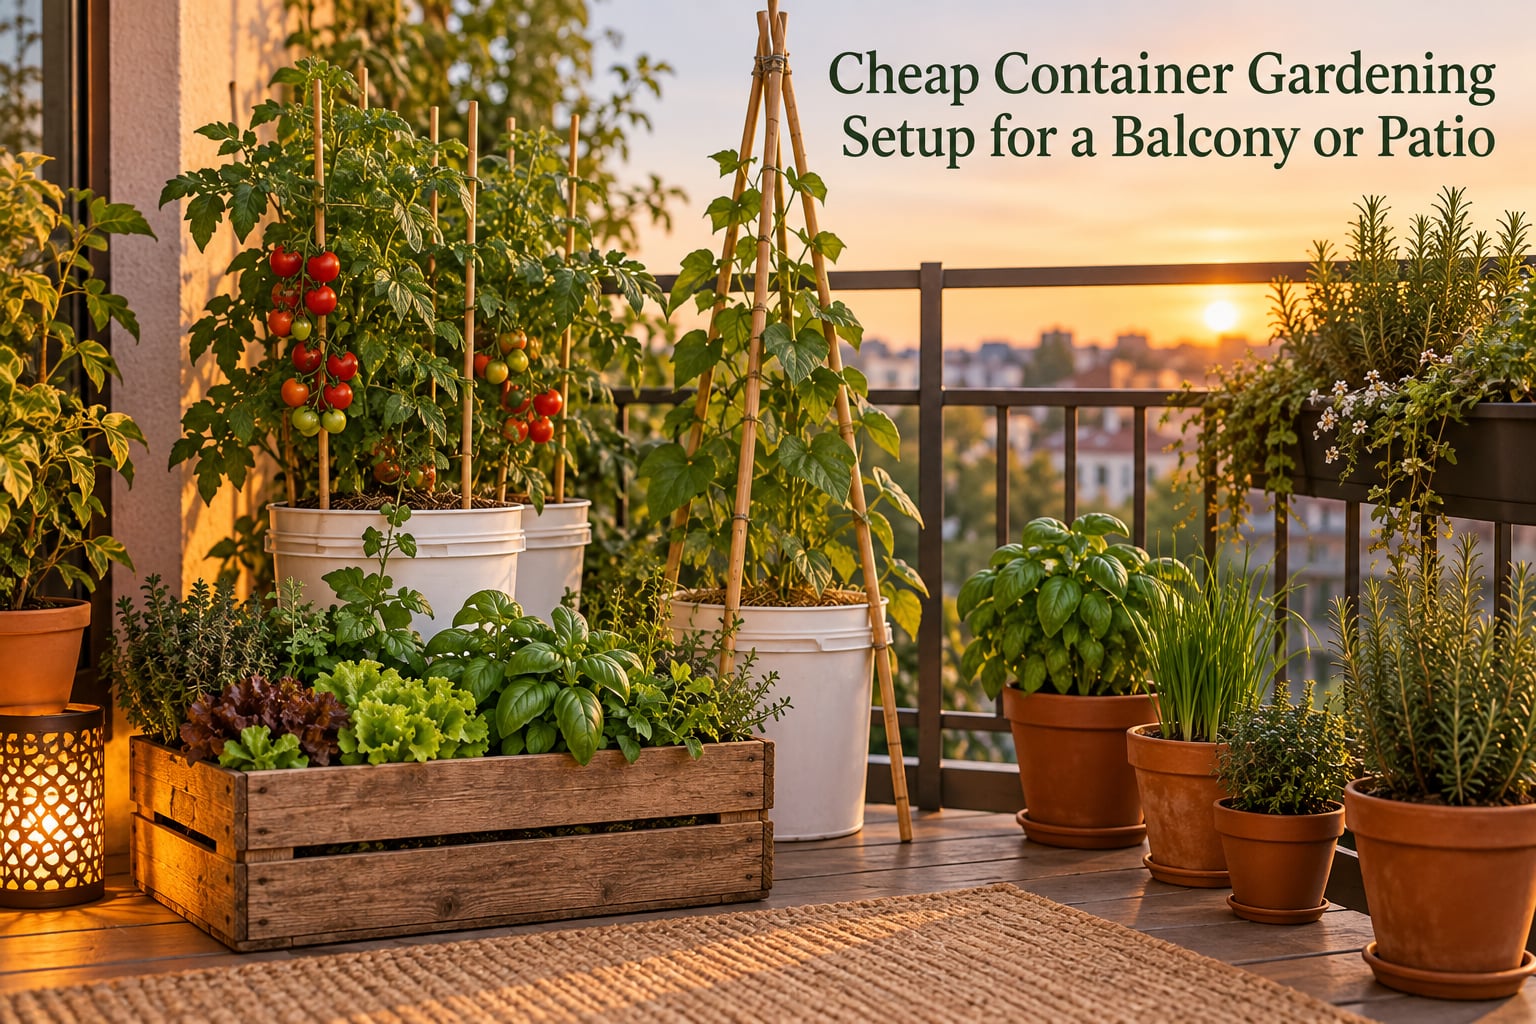
A cheap container gardening setup for a balcony or patio is the fastest way to grow real food in a space that was never meant to hold soil. You need containers, potting mix, seeds or seedlings, water and about ten hours of work spread across one weekend. That is genuinely the whole list.
Most people assume they need a yard, a raised bed, or a spendy self-watering planter system. You do not. A five-gallon bucket with two holes drilled in the base holds a tomato plant that produces all summer, and the same bucket can be free if a bakery or restaurant near you gives away food-grade ones.
I have helped friends in apartments go from a bare concrete slab to a producing balcony garden over a handful of weekends. The pattern repeats every time: the people who succeed spend their first hour measuring light and their first dollar on potting mix, and the people who struggle buy decorative pots before they know how much sun the space actually receives.
This guide walks through the whole setup in the order you should actually do it. You will learn how to map sunlight, how to check whether your balcony can carry wet soil, which containers work for which crops, how to mix your own potting medium, and what to plant first for the biggest return per pot.
Every recommendation here is built around keeping spending down. Where a material costs more, you will hear what you give up for it. Where something is free, you will hear exactly where it comes from.
Updated for 2026, and relevant to our Edmonton growing season and other northern climates where the frost-free window is short and the balconies are bright but cool.
Table of Contents
- How to Map Sunlight on Your Balcony Before You Buy a Single Pot
- How Much Weight Can a Balcony Hold for a Container Garden?
- What Are the Best Containers for a Balcony Garden?
- What Potting Mix Should You Use for Balcony Containers?
- What Are the Best Plants to Grow in Container Gardens on a Balcony?
- Your Weekend Container Gardening Setup Plan
- Vertical Growing Systems That Survive a Rented Balcony
- How Often Should You Water Container Plants on a Balcony?
- What Are Some Budget-Friendly Ideas for Container Gardening?
- Common Container Gardening Problems and How to Fix Them
- A Realistic Look at Year One on Your Balcony
- Frequently Asked Questions
- What are the best plants to grow in container gardens on a balcony?
- What is the 70/30 rule in gardening?
- What are some budget-friendly ideas for container gardening?
- What are the best containers for a balcony garden?
- How much weight can a balcony hold for a container garden?
- How often should I water container plants on a balcony?
- What potting mix should I use for balcony containers?
- Can I grow tomatoes on a balcony in containers?
- Start This Weekend, Not Next Season
How to Map Sunlight on Your Balcony Before You Buy a Single Pot
Quick Answer: Map the sun in four steps over three days. Note the hour your space first hits direct sun, when it loses it, which walls or railings throw shadows, and whether neighbouring buildings block it. Anything under four hours of direct sun grows greens, herbs and root crops. Six hours or more opens the door to fruiting plants like tomatoes and peppers.
Building shadows are the number one reason a balcony garden underperforms. A space that looks bright at noon in January can sit in the neighbour’s shadow from March through September, and the change is invisible unless you track it.
The four-step sunlight mapping method
Step 1: Pick a tracking day that is representative. A clear midsummer day exaggerates your light. A cloudy one undersells it. Choose a day with a mix of sun and thin cloud, ideally in the middle of your growing season, and repeat the process on two separate days.
Step 2: Set hourly reminders on your phone. Start at the time the sun clears the nearest building and check every hour until it sets. A single glance takes five seconds, so you can do it from your desk in the morning and your kitchen in the evening.
Step 3: Record direct hours, not ambient hours. Direct sun means a hard-edged shadow on the floor or wall. Bright overcast light and light bouncing off a pale wall do not count. Write down the number of hours of direct sun, then add the number of hours of bright indirect light separately.
Step 4: Mark the good spots and the bad spots. Most balconies have one corner that is clearly better than the rest. That is where the tomato goes. The shadier wall is where lettuce, parsley and mint live without complaint.
Microclimate heat mapping: the part nobody tracks
A dark brick wall, a west-facing concrete slab and a glass railing all radiate heat after midday. That reflected heat can raise the temperature around a container several degrees above the air reading, which is often the difference between a strawberry that ripens and one that sits pale and sour.
Put your hand an inch above the surface at midday on a sunny day. If it is uncomfortably hot, treat that spot as a warm microclimate. A spot that stays cool and bright all afternoon is closer to a spring climate, which suits greens, brassicas and root vegetables better than peppers.
Two more variables matter. Wind on an upper floor dries containers far faster than the same pots at ground level, and sheltered corners next to a parapet wall can trap enough heat to cook a shallow container in a week. Test the wind by holding a tissue at pot height for a few seconds, and check whether your railing blocks it.
For Edmonton balconies specifically, the growing window runs roughly from late May to the first hard frost in September, so the four-hour minimum matters more here than a sunnier climate. Plan cool-season crops for spring and early summer, then swap in warm-season plants after the last frost date.
How Much Weight Can a Balcony Hold for a Container Garden?
Quick Answer: Ask your building manager for the balcony’s rated load and get the number in writing before you fill a single pot. As a working guide, a balcony rated for 1,000 pounds per square foot can carry a modest container garden, but a wet five-gallon pot of soil weighs 40 to 50 pounds on its own. Never hang planters on a railing you have not had rated, and never block a drain.
Water is the hidden weight. Dry potting mix is light. Saturated potting mix is roughly twice as heavy, and a container that drains freely in the rain can double in weight overnight. Most building codes are built around people, not soil, so a load of wet planters concentrated in one corner is the real risk.
How to work out your own load
Pick up a full five-gallon container of water at the gym for a reality check. It is about 40 pounds. Two of those on one square foot of balcony is 80 pounds of concentrated load sitting over a single slab section, before you add the weight of the people who use the space.
Spread the load. Distributing six medium containers across the full width of a balcony puts far less stress on any one spot than stacking six of them in the corner nearest the wall. If you must concentrate weight, do it along the building wall, close to the structure, where the slab is supported.
What renters and HOA members need to know
Most leases in Canada address alterations rather than planters, but the phrase no structural changes covers drilling, railing-mounted frames and anything fixed permanently. Ask before you drill, and get the answer in writing. A short message is enough:
“I plan to place unplanted and planted containers on my balcony this season, all within the posted weight limit, with saucers underneath to protect the concrete. Nothing will be drilled or attached to the railing. Can you confirm this is acceptable?”
Some buildings also regulate watering that runs off the balcony, because runoff stains the facade of the unit below. Drip trays with a reservoir, or a mat under the pots, solve both problems at once.
Railing planters and the safety warning
Railing planters look great and they are a genuine fall hazard if mounted loosely. Two rules keep you safe. First, only use planters designed to clamp onto a railing, never ones you balance on top of it. Second, check the rail’s own limit, not just the balcony’s, because most standard residential railings are decorative and rated for body weight only in a small section.
A safer alternative is a freestanding unit that sits on the deck behind the railing. You keep the vertical space without loading anything you have not tested.
What Are the Best Containers for a Balcony Garden?
Quick Answer:For most balconies, the best containers are fabric grow bags and lightweight plastic or resin pots with real drainage holes. Both are light, cheap and hold moisture better than terracotta. Avoid unglazed clay and concrete on an upper balcony, because weight and watering frequency are the two things you least want to manage there.
Container materials compared
| Material | Relative cost | Weight when full | Moisture retention | Best for |
|---|---|---|---|---|
| Plastic nursery pot | Lowest | Light | Good | Herbs, greens, cheap starter pots |
| Food-grade bucket | Free to low | Moderate | Good | Tomatoes, peppers, cucumbers |
| Fabric grow bag | Low | Light | Low, dries fast | Root health, plants that hate wet feet |
| Resin or fibreglass | Moderate | Light | Very good | Long-term, decorative, cold hardy |
| Self-watering plastic | Moderate | Moderate | Excellent | Travel, hot balconies, forgetful waterers |
| Terracotta or ceramic | Moderate to high | Heavy | Poor, porous | Small herbs, decorative cachepots |
| Wooden planter | Moderate | Heavy when wet | Very good, insulating | Ground-level patios, cold regions |
| Concrete or stone | High | Heaviest | Very good | Stable anchor plants, permanent installs |
Read that table with the balcony in mind. Everything that says heavy or poor retention becomes a problem several floors up, where wind and reflected heat strip moisture faster than the plant can draw it back from soil.
Matching container size to crop
Sizing is the single biggest determinant of whether a container plant thrives. Too small means the roots circle, the mix dries in hours, and the plant bolts or fruits prematurely. Too large is only a problem on a balcony, where a generous pot filled with wet soil is a lot of concentrated weight.
| Crop | Minimum depth | Ideal volume | Example varieties |
|---|---|---|---|
| Leaf lettuce and salad greens | 6 inches | 1 to 3 gallons | Buttercrunch, Salanova |
| Radish, beetroot | 6 inches | 2 gallons | French Breakfast, Detroit Dark Red |
| Herbs, basil, parsley, chives | 8 inches | 2 to 3 gallons | Genovese basil, curly parsley |
| Carrot, short varieties | 8 inches | 5 gallons, deep pot | Parisian, Chantenay |
| Pepper and hot pepper | 10 inches | 3 to 5 gallons | Lunchbox, Calabrese, Carolina Reaper |
| Tomato, determinate | 12 inches | 5 gallons | Micro Tom, Patio Princess, Bush Champion |
| Strawberry | 8 inches | 2 to 3 gallons | Ever-bearing alpine types |
| Cucumber | 12 inches | 5 gallons | Bush Champion, container types |
| Dwarf citrus | 14 inches | 7 gallons | Meyer lemon, calamondin |
Two rules cover most cases. A fruiting plant needs a container deep enough that the potting mix stays damp from morning to evening, and a container wide enough that the roots can fan out rather than circle. A plant sitting in a pot the same width as the top of a tomato seedling will not last the season.
Free and upcycled containers
The cheapest container is one you have already paid for or one somebody else wants to get rid of. Gardeners report baking for bakery buckets, but I like the approach of asking directly, because a restaurant or bakery with a steady supply will often just hand over a stack.
- Food-grade five-gallon buckets. Used for pickling or dry goods. Drill four to six drainage holes, 5 mm or so, in the base. Seal any screw threads with silicone tape.
- Storage totes. Big enough for greens and potatoes. Again, drill the base. Keep the lid as a mini greenhouse in the spring.
- IKEA food-safe tubs. A cheap, consistent option that fits narrow railings.
- Paint cans and large tins. Drill carefully and line the inside so the metal does not heat up and cook the roots.
- Buckets from a hardware store paint department. Heavy duty, and they stack.
Whichever you choose, drainage is not negotiable. A container without holes fills with water until the roots suffocate, and a container with a single hole at one corner still leaves a wet pocket where the soil compacts. Six holes spread evenly across the base costs nothing extra and prevents both problems.
One myth to retire: a layer of rocks at the bottom does not improve drainage. It creates a perched water table that keeps the mix above it saturated, which is the opposite of what you want. Skip the rocks, skip the landscape fabric, and use a free-draining mix with perlite or coir instead.
The cachepot system for decorative containers
If you want a balcony that looks styled rather than utilitarian, buy one decorative pot and one nursery pot that fits inside it. Plant in the nursery pot, set it inside the decorative pot, and use the gap to add a small reservoir or a layer of mulch that hides the rim. The hidden pot is easy to lift out for watering, repotting or moving in for winter.
What Potting Mix Should You Use for Balcony Containers?
Quick Answer:Use a soilless potting mix, not garden soil. Garden soil compacts, drains poorly and carries no nutrients, and in a container it suffocates roots within weeks. Buy a cheap general potting mix and improve it with perlite and compost, or mix your own with a 2:1:1 ratio of compost, coir and perlite.
Why garden soil fails in a pot
Garden soil is designed for a world where worms and subsoil structure keep it loose and where roots can travel metres to find water. A bucket holds maybe 13 litres of it, and nothing is doing the aerating. The result is a dense plug that drains slowly, holds air poorly and lets roots suffocate in wet conditions.
There is also the disease angle. Soil-borne fungi, nematodes and weed seeds travel with garden soil, and a dense container planting has no biological diversity to fight them. Fresh soilless mix gives plants a sterile start.
What the 70/30 rule actually means
The 70/30 rule is shorthand for the balance between water retention and air space in a container medium. Roughly 70 percent of the volume should hold moisture and feed roots; roughly 30 percent should be air space. Get that balance right and you can cut watering frequency dramatically. Skew it toward 90 percent water-holding material and you get waterlogging, yellow leaves and root rot. Skew it toward 30 percent water and you get a pot that dries out before lunch.
You do not measure this with a lab. You judge it by feel: a properly mixed handful of potting media holds its shape when squeezed, then falls apart with a gentle tap, and never feels like a solid wet brick.
The DIY potting mix recipe
Mix your own in any clean container and a large bag, a shovel and a bit of elbow grease. The classic low-cost ratio is two parts compost to one part coir or peat to one part perlite.
- Compost or screened topsoil, 2 parts. Supplies nutrients and biology. Mature compost from a municipal program or a friend’s pile is often free.
- Coconut coir or peat, 1 part. Holds water without collapsing. Coir rehydrates fast after drying, unlike peat.
- Perlite, 1 part. The air space. Lightweight and inert, and it is the single cheapest upgrade you can make.
A 5-gallon bucket of finished mix is roughly a two-parts compost blend, so a single standard bucket scooped twice, plus one bucket each of coir and perlite, fills three large containers once you account for the 15 percent settling space. Add a slow-release organic fertilizer at the label rate if your compost is not already fortified.
How to buy potting mix without overspending
Big bags are almost always cheaper per litre than small ones, and a big bag is worth storing if you have a shed or a covered corner. If you have no dry storage, buy the smallest bags and skip the sale entirely.
Watch for the words potting mix, container mix or soilless mix on the bag. Multipurpose or garden mix sold for in-ground beds is denser and cheaper, and it is not what you want in a pot. Skip anything sold as moisture-retentive hydrogel unless you genuinely travel for a week at a time, because the water holding capacity of the medium is usually enough on its own.
What Are the Best Plants to Grow in Container Gardens on a Balcony?
Quick Answer:The best plants for a balcony container garden are salad greens, radishes, herbs, peppers, determinate tomatoes, bush cucumbers and strawberries. Choose compact or dwarf varieties, pick a mix of quick crops and long crops so something is always ready, and always read the mature size on the seed packet rather than the photo.
Start with the highest yield per pot
Not all plants pay the same rent for the same pot. A single five-gallon bucket of cherry tomatoes can give you two or three pounds of fruit across a season, while a bucket of radishes gives you a handful of harvests and then needs replanting. Balance both in the same bucket and you can be eating all summer.
- Micro Tom and Patio Princess tomatoes. Both are determinate, meaning they set most of their fruit low on the plant and stop growing, so they fit a balcony without a tall cage.
- Lunchbox and Calabrese peppers. Compact, heavy yielders that tolerate a slightly shadier spot.
- Bush Champion cucumber. A true bush type that stays under a metre without a trellis.
- Salad greens, mizuna, arugula. Fast, forgiving, and they fill a shallow window box that most crops would refuse.
- Chives, thyme, parsley, mint. Herbs are the best value in a container because a pinch is enough. Mint needs its own pot, always.
- Alpine and ever-bearing strawberries. Fruit that hangs over the rim of a pot, so the space underneath is not wasted.
Avoid indeterminate or vining tomatoes unless you have a tall, strong trellis and a very sunny corner. A balcony with six hours of sun and a railing in the way will produce a mess of vines and very few ripe fruit.
Stacked planting: get two crops from one pot
Layering works because plants use different heights. Put a short root crop like radish or beetroot in the lower third of a deep container, then a taller pepper in the upper third. The radish is out before the pepper needs the full root zone, so nothing is crowded.
A 15-gallon storage tote can hold a tomato in the middle, basil around the base and a row of radishes along the front edge. Reviews of this method suggest the radishes finish in about four weeks, well before the tomato canopy closes over them.
Companion planting in containers
Companion planting works in pots for two reasons: it saves space, and it can confuse pests. No competitor in this space covers it properly, so here is the practical version for containers only.
- Tall and shady partners. Peas and pole beans cast dappled shade that slows bolting in lettuce and spinach planted nearby.
- Pest confusion. Basil planted beside tomatoes and peppers is widely reported to reduce the pressure from aphids and whitefly. Marigold at the pot rim is a common trap crop for spider mites.
- Pollinator magnets. A flowering herb like thyme or oregano in one pot pulls hoverflies and ladybirds into the whole cluster of pots.
- Nutrient sharers. Radishes and leafy greens take less nitrogen than fruiting plants, so pairing them in a stacked pot keeps the shallow layer from overfeeding.
One caution: companions still share the same pot, so the same watering and feeding rules apply to the whole group. Mint and other aggressive spreaders do not make good companions because they take over the container.
Your Weekend Container Gardening Setup Plan
Quick Answer:Set up a balcony container garden in two days. Saturday covers measuring, containers, soil, watering in and planting. Sunday covers seeds, trellises, mulch, a first watering and a final check. Do not skip the Saturday watering-in step, because dry mix that wets unevenly is the biggest source of early failure.
Saturday: build the foundation
Saturday morning: measure and decide. Note the sun hours from your mapping, check the load rules with your building manager, and pick your spot. Clear the area completely and sweep the slab, because grit under pots scratches the concrete over time.
Saturday midday: prep containers. Wash reused pots with hot soapy water. Drill drainage holes in anything repurposed, four to six holes spread across the base. Set each pot where it will live, because moving a full five-gallon bucket is a two-person job.
Saturday afternoon: mix and fill. If you are mixing your own, do it in a wheelbarrow or on a tarp. Fill each container to about two inches below the rim, leaving room for a top layer of mulch. A two-inch mulch cap is the cheapest evaporation cut you can buy.
Saturday evening: water in and plant. Water the filled containers thoroughly and let them drain. Plant one item per pot, at the same depth it was growing in the nursery pot. Firm the mix lightly around the root ball, water again, and add the mulch layer.
Sunday: add crops and finish
Sunday morning: direct sow. Sow radish, lettuce, carrot and bean seeds directly into containers, following the packet’s sowing depth. Lettuce barely needs covering; carrots want a light dusting and consistent moisture until they germinate.
Sunday midday: install supports. Add a bamboo tripod, a lattice panel or a twine trellis for anything climbing. Anchor supports before the plants grow into them, because working between a root ball and a wall is miserable later.
Sunday afternoon: mulch, saucer, check. Top-dress with a two-inch layer of mulch. Set drip trays under anything on a shared balcony. Then walk the whole space and confirm nothing blocks a drain and nothing sits where someone has to step.
Sunday evening: write the watering schedule. Decide who waters on which day. The most common year-one failure is not a dead plant, it is a neglected one during a long weekend away.
Vertical Growing Systems That Survive a Rented Balcony
Quick Answer:The safest vertical systems for a rented balcony are ones that rest on the deck and lean against the railing: a bamboo tripod, a ladder-style tiered stand, or a railing planter clamped on rather than hung. Avoid anything drilled into the wall or the floor, and avoid tall planters where a child could climb them.
Vertical space is the most undervalued resource on a typical balcony, where floor area is under three square metres but wall and railing area is far larger.
Four systems worth the money
- Bamboo tripod. Three poles lashed at the top, sitting in a five-gallon bucket. Holds one tomato and costs almost nothing. Anchor the base with a rubber mat so the tips cannot walk across the slab in wind.
- Tiered or ladder stand. Puts smaller pots at eye level and larger ones at the base. Best value if you buy one, and the tiered levels keep foliage off the wet concrete.
- Railing planter, clamped. Clamps on with a U-bolt and rests on the deck with support feet, so no load goes on the rail itself. Check the manufacturer’s weight rating and add a sacrificial liner to catch leaks.
- Wall-hung hook planters. Hang from a tension rod in a doorway or a no-drill rail fixed between posts. They put vines where they are not taking floor space at all.
What actually works as a trellis
Twine is the cheapest and the best for beans, peas and cucumbers. Run it from the top of the tripod to a stake at soil level and tie the stems loosely as they grow. Paperclips, split-off coat hangers and lengths of old garden hose all work as ties.
Anything taller than about 1.5 metres needs two anchor points and a wide base, or the wind will treat it as a sail. Vignettes from gardeners on high-rise balconies describe exactly this: the pot stayed put, the cane did not.
How Often Should You Water Container Plants on a Balcony?
Quick Answer:Check daily, water when the top two to three centimetres of the mix feel dry, and expect to water most containers once a day in peak summer on a sunny, windy balcony. Small terracotta pots in full sun can need two waterings a day. A finger test is more reliable than any fixed schedule.
The finger test
Push a finger into the mix to the first knuckle. If it feels cool and damp, wait. If it is dry at the knuckle and the pot is light when you lift it, water now. Water slowly at the rim until water runs out of the drainage holes, then wait ten minutes and check the saucer before adding more.
A moisture meter costs little and helps with deep containers where your finger cannot reach the root zone, but the finger test is more accurate in shallow window boxes. A stuck-at-the-top meter is a common failure, so probe at the side of the pot rather than straight down.
When soil repels water
Potting mix that has dried out completely can become hydrophobic, meaning water beads on the surface and runs down the sides without soaking in. The fix is bottom-watering. Stand the container in a shallow tray of water for 20 minutes so the mix wicks from below, then drain it fully.
Group pots close together to raise humidity around the canopy. Wind blows across an open balcony far harder than it blows through a cluster, and grouping cuts evaporation noticeably.
Self-watering containers
A self-watering container has a water reservoir under the growing medium with a wicking layer pulling moisture upward. It typically means you water once every three to five days instead of daily, which is why frequent travellers adopt them. For Edmonton’s short, bright season, they are less critical than in a hot climate, and they are not the cheapest option.
A budget version works well: a shallow tray under the pot, a cotton cord running from the tray into the drainage hole, and the whole thing refilled weekly. It is not perfect, and it can keep roots too wet in a rainy week, so use it during hot dry spells rather than all season.
Fertilising on a schedule
Container plants have no ground to draw nutrients from, and every watering leaches a little away. That process is called leaching, and it is why a pot that looks fine in June can show yellow lower leaves by August.
- At planting: slow-release fertilizer mixed into the top five centimetres of the mix, at the label rate.
- Every two to three weeks in season: a dilute water-soluble feed, half strength. More is worse in a pot, because salts build up fast.
- At mid-season: top-dress two centimetres of compost to the surface of any heavy feeder.
Yellowing leaves with green veins usually signal a nitrogen shortage. Yellowing with brown, crispy edges usually signals salt buildup or drought, so flush the pot with plain water before adding anything else.
What Are Some Budget-Friendly Ideas for Container Gardening?
Quick Answer:The cheapest container garden is built from free buckets and totes, a bag of general potting mix improved with perlite, and seeds borrowed from a library seed programme. Start small with herbs and salad greens, add a tomato or two once you know your space’s limits, and spend nothing on decorative pots until year two.
Three budget tiers
Gardeners report a realistic starter range of a few dozen dollars up to around three hundred, and the spread is almost entirely containers and plant material, not soil. Here is how to land at each level.
Tier 1, the bare minimum. Two free five-gallon buckets, a small bag of general potting mix, a bag of perlite, a packet each of lettuce and radish seed, and two nursery herb plants. This produces genuine salad greens within a month and something more substantial by mid-season, and most of the outlay is covered if you source the buckets for free.
Tier 2, the sensible middle. Everything above, plus a five-gallon bucket tomato, a pepper, two fabric grow bags, a bamboo tripod, a slow-release fertilizer and a small coir-based self-watering planter. This is the tier most first-year gardeners should aim for, because it is the cheapest setup that still produces tomatoes and peppers.
Tier 3, the full balcony. Add a set of lightweight resin containers for the decorative pots, a proper tiered stand, a soil moisture meter and a second tomato. Buy these only after the cheap setup has told you what you actually want to grow.
None of those figures include a balcony load upgrade, which is free if you simply ask. Weight, not cost, is what limits a real balcony garden.
Where the money is not
- Seeds, not seedlings. A single packet of lettuce or bean seed covers an entire season of succession sowing, and costs a fraction of a plant. Seedlings are the single most expensive line item in a new balcony garden, and they are only needed for things you cannot grow from seed in the time you have.
- Seed libraries and swaps. Many public libraries in Canada run a seed library, where you borrow a packet, grow it, and return a portion at the end of the season. Ask your local branch directly; most branches will say yes if nobody has asked before.
- Perlite, not premium potting mix. A 10-litre bag of general mix plus a small bag of perlite costs less than a premium container mix, and the root results are close.
- Mulch you already have. Grass clippings, shredded leaves or a handful of stones cost nothing and cut watering. Avoid collecting grass clippings from a lawn treated with weedkiller.
Where the money is worth spending
Spend on drainage. A cheap drill bit and half an hour of work beats buying a planter that fails in a wet month. Spend on the tomato’s container, since one undersized pot wastes a whole season’s seed money. And spend on the potting mix, because a plant in good medium outperforms a plant in a beautiful pot of bad soil every single time.
Hold off on self-watering planters, decorative cachepots and multi-tier vertical towers until you have a season of data on how much you actually water and how much room you have left.
Common Container Gardening Problems and How to Fix Them
Quick Answer:The most common container problems are mix that dries out too fast, water that will not soak in, pests such as spider mites and aphids, plants that have outgrown their pot, and a balcony that is heavier than you planned. All five are fixable once you can identify which one you actually have.
Fast-drying soil
Symptoms are wilting at noon but wet by evening, or a plant that needs water daily in a mild week. The causes are a shallow container, a windy corner, a dark pot in full sun, or a mix with too much peat and not enough perlite. Fixes, in order of effect: add a two-inch mulch cap, move the container out of the wind, and repot one size up with a better mix.
Yellow leaves and dying stems
If the lower leaves yellow first and the plant is pale, suspect nitrogen shortage. If the leaves yellow with crisp brown edges, suspect salt buildup from over-feeding, and flush the container with two litres of plain water per pot before fertilising again. If the stems are soft at the base and the mix smells sour, it is waterlogging, and the answer is more perlite next time and better drainage now.
Spider mites and aphids
Spider mites show up as fine yellow stippling on leaves and webbing underneath, and they love a hot, dry, dusty balcony. Aphids cluster on new growth. Both spread fast through a dense cluster of containers, which is exactly what a balcony is.
Spray both with a solution of water and a small amount of dish soap, applied to the undersides of leaves every few days. Ladybirds and hoverflies do most of the work if you let some flowering herbs bloom, and a strong fan of air from an open window discourages mites. Isolate a badly infested pot from the rest of the balcony until it recovers.
Root-bound plants
Signs are water running straight through without soaking in, roots circling out of the drainage holes, and growth that stalls. Check by sliding a finger down the inside wall of the container. If you meet a dense wall of roots, move up one container size and refresh the mix.
Fabric grow bags slow this process because their porous sides air-prune the roots, which encourages a denser, healthier root mass. Fabric does dry faster, so they need closer watering attention than plastic.
Dripping water and angry neighbours
Dripping off a balcony stains the facade and is the fastest way to lose a landlord’s goodwill. Three fixes handle most of it: set pots on drip trays, group them on a mat, and pull them back from the railing edge by a few centimetres so runoff falls on the tray rather than off the slab. Water in the morning so any spill dries before evening.
Wind damage and tip-over
A five-gallon bucket full of soil and water is a sail. Anchor tall pots to a wall or railing with a soft tie, fill containers right to the top when the plant is mature, and use a shim or rubber mat on the deck so pots do not walk. Never put a top-heavy plant where someone has to squeeze past it.
A Realistic Look at Year One on Your Balcony
Year one is a learning year, and the honest version is that some of it fails. Most gardeners report losing at least one plant to a heat wave, a holiday or an overwatering mistake. A setup that produces a handful of salads and one genuinely good crop of tomatoes in its first season is a success, not a shortfall.
What tends to go wrong early: seedlings planted too late in spring and hit by a heat wave before their roots establish, containers filled too generously and made too heavy, and a watering routine that was optimistic in the first two weeks and abandoned by July.
What tends to go right by month three: a mix that has settled, roots that have filled the pot, and a watering habit that now happens on autopilot. By September most gardeners are harvesting something daily rather than occasionally, and most are already planning which crops get a bigger pot next year.
Keep a simple notebook. Every date you watered, every plant that died and what you think caused it. In year two that notebook is worth more than any product you could buy.
Frequently Asked Questions
What are the best plants to grow in container gardens on a balcony?
The best balcony container plants are salad greens, radishes, herbs, peppers, determinate tomatoes, bush cucumbers and strawberries. Choose compact or dwarf varieties such as Micro Tom or Patio Princess tomatoes, Bush Champion cucumber and alpine strawberries, and read the mature size on the seed packet rather than trusting the photo. Mix quick crops with long crops so there is always something ready to harvest.
What is the 70/30 rule in gardening?
The 70/30 rule describes the ideal balance of water retention to air space in a container growing medium. About 70 percent of the volume should hold moisture and feed roots, and about 30 percent should be air space. Get it wrong in either direction and you get waterlogging or a pot that dries before lunch. Test a handful: it should hold shape when squeezed, then crumble with a tap.
What are some budget-friendly ideas for container gardening?
Build the setup from free food-grade five-gallon buckets and storage totes with drilled drainage holes, a general potting mix improved with perlite, and seed borrowed from a library seed programme. Start with herbs and salad greens, which cost almost nothing from seed, and add a tomato or two later. Skip decorative pots, self-watering planters and multi-tier towers until you have a season of data.
What are the best containers for a balcony garden?
Fabric grow bags and lightweight plastic or resin pots with real drainage holes are the best containers for most balconies. Both are light, inexpensive and hold moisture better than terracotta. Drill four to six holes across the base of anything repurposed, and size the container to the crop: 1 to 3 gallons for greens, 3 to 5 for peppers and bush cucumbers, and 5 for determinate tomatoes.
How much weight can a balcony hold for a container garden?
Ask your building manager for the balcony’s rated load in writing before you fill any pot. As a guide, a saturated five-gallon container of soil and water weighs roughly 40 to 50 pounds, and wet soil is about twice as heavy as dry. Distribute containers across the full width of the balcony rather than concentrating them in one corner, and never hang planters on a railing you have not had rated.
How often should I water container plants on a balcony?
Check every day, then water when the top two to three centimetres of mix feel dry to a finger. On a sunny, windy balcony in peak summer, most containers need water once a day and small terracotta pots in full sun can need two. Water slowly at the rim until it runs from the drainage holes. If the mix repels water, stand the pot in a shallow tray of water for 20 minutes to re-wet it from below.
What potting mix should I use for balcony containers?
Use a soilless potting or container mix, never garden soil, which compacts, drains poorly and carries no nutrients. Budget options are general potting mix improved with perlite, or your own mix at two parts compost to one part coconut coir to one part perlite. Leave two inches of space at the top of each container for a mulch cap, which is the cheapest way to cut evaporation.
Can I grow tomatoes on a balcony in containers?
Yes, if you choose determinate or bush varieties and your balcony gets at least six hours of direct sun. Micro Tom, Patio Princess and Bush Champion all stay compact enough for a five-gallon bucket. Add a bamboo tripod or twine support before the plant grows into it, water consistently to prevent blossom end rot, and skip indeterminate vining types unless you have a tall, strong trellis and a very sunny corner.
Start This Weekend, Not Next Season
A cheap container gardening setup for a balcony or patio comes down to four decisions: how much sun you actually have, how much weight you are allowed to put down, what you will grow, and where the mix comes from. Get those right and everything else is detail.
Start with the free containers and one bag of mix. Grow salad greens and radishes first because they prove your watering routine within a month, and add a tomato only once the greens are already working. Track what dries out and what you forget, then buy for the second season with real information instead of a wish list.
The best time to start was last spring. The second best time is this weekend, and the balcony you are standing on has everything you need on it already.