
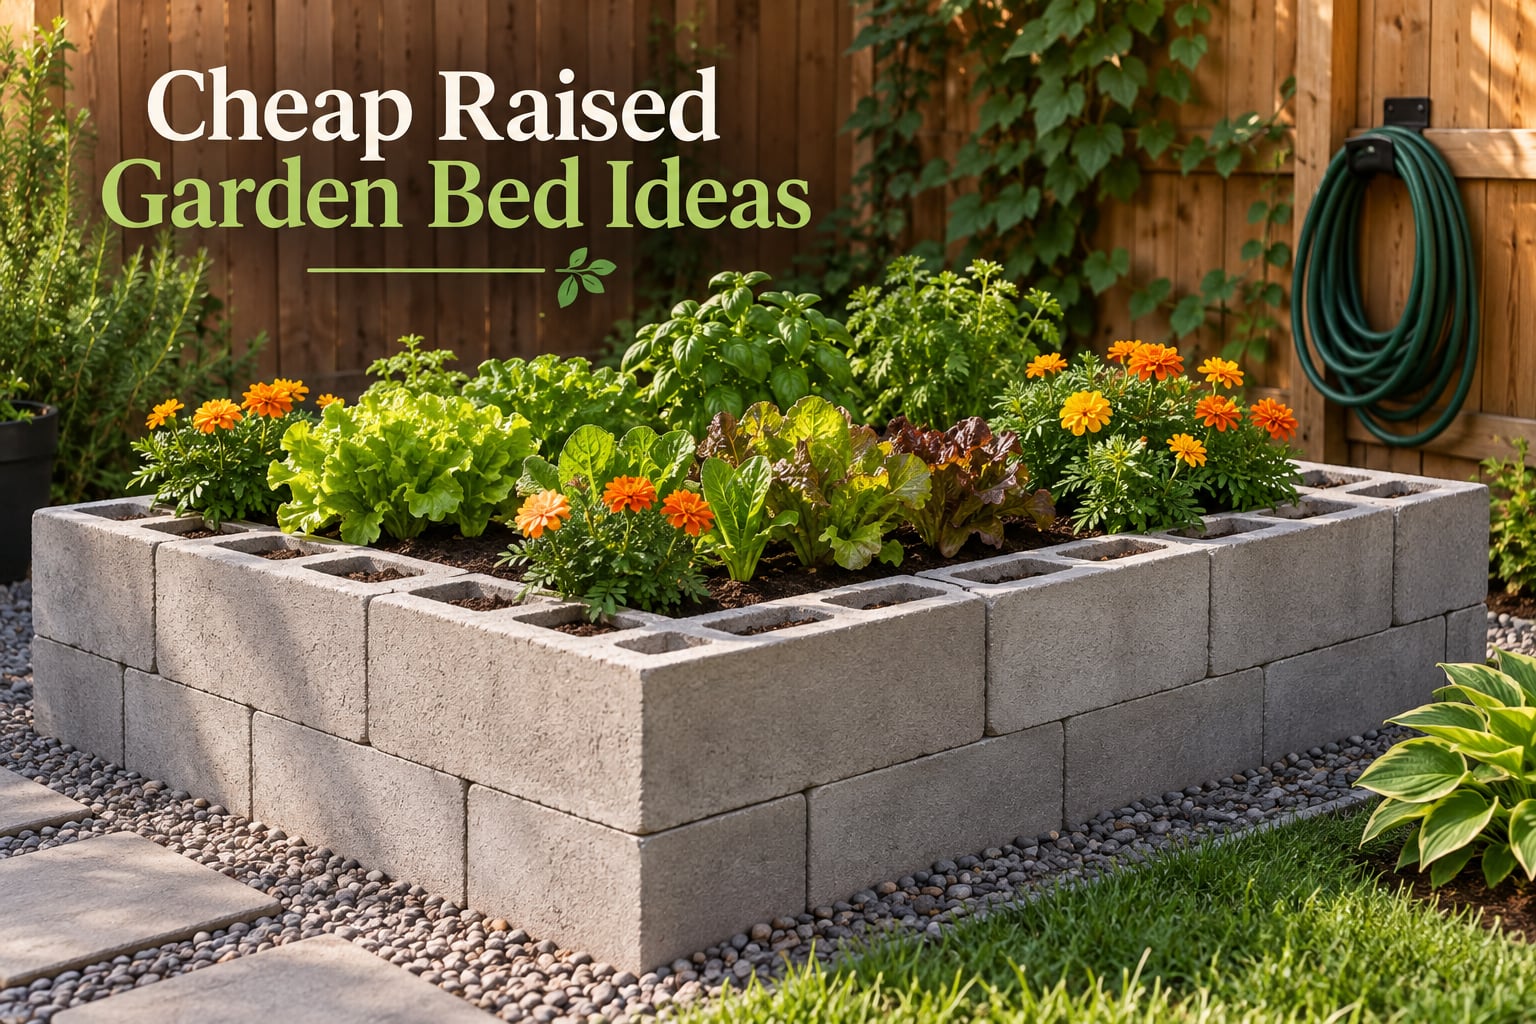
The cheapest way to make a raised garden bed is to frame it with cinder blocks, reclaimed or free wood, or an upcycled container instead of premium lumber or a ready-made kit. A full 4×8 bed can be built almost entirely from salvaged materials and yard waste, and even a store-bought frame runs 40 to 60 percent less than the equivalent kit.
I have built and rebuilt raised beds in three different Edmonton yards over the last decade, and the pattern never changes. The frame is the cheap part. Soil is the expensive part. The people who end up with a beautiful bed for almost nothing are the ones who source the frame creatively and the soil in bulk.
Raised beds earn their place in a cold-climate yard for reasons that have nothing to do with cost. Lifting the soil eight to eighteen inches above the ground buys you drainage you cannot dig in, a growing surface that warms several weeks earlier than open ground in May, and a way to garden on compacted clay without renting a tiller. They also cut the amount of bending in a season down to nearly nothing, which matters more the older you get and the more tomatoes you want to pick.
| Rank | Build method | Frame cost | Lasts |
|---|---|---|---|
| 1 | Free or reclaimed wood from a salvage source | Lowest | 3 to 10 years |
| 2 | Cinder block stacked and dry-stacked | Low | 50+ years |
| 3 | Cedar fence pickets with corner posts | Low to moderate | 10 to 15 years |
| 4 | Upcycled container (trough, tub, fabric bag) | Low | Varies widely |
| 5 | Timber edging with rebar anchoring | Moderate | 10 to 20 years |
| 6 | Basic 2×6 lumber with corner posts | Moderate | 5 to 10 years |
| 7 | Corrugated metal or galvanized steel | Moderate to high | 20 to 50 years |
| 8 | Ready-made cedar or fir kit | Highest | 15 to 20 years |
KEY TAKEAWAYS
- Cheapest frame: cinder blocks or free reclaimed wood, dry-stacked and anchored so they never move.
- Biggest saving: buy soil in bulk by the cubic yard and cut what you buy with hugelkultur layers. Soil usually costs more than the frame.
- Safety rule: if a pallet has no HT stamp and no green tint, it is heat-treated, not chemically treated, and safe for food crops.
- Never use: railroad ties or creosote-treated timbers in a bed you eat from.
- Keep it narrow: four feet wide is the widest a bed can be if you want to reach the middle without stepping on the soil.
Table of Contents
- What Is the Cheapest Way to Make a Raised Garden Bed?
- Cheap Raised Garden Bed Ideas by Material
- Free and Recycled Materials: Where to Actually Find Them
- How to Fill a Raised Bed Without Buying a Pile of Soil
- Step-by-Step: The Cedar Fence Picket Raised Bed
- Building Your Bed in Sections, One Season at a Time
- How Much a Cheap Bed Gives Back Over a Season
- Sizing Your Bed So It Does Not Bow
- Treated Wood, Pallets and Railroad Ties: What Is Actually Safe to Eat From
- Upcycled Container Beds That Cost Almost Nothing
- Cold Climate Raised Beds for Edmonton Growers
- Watering on a Budget
- What to Plant in a Cheap Bed for the Best Return
- Is It Cheaper to Build or Buy a Raised Garden Bed?
- Tools You Can Skip
- Common Mistakes That Ruin Cheap Beds
- Frequently Asked Questions
- What is the cheapest way to make raised garden beds?
- How do I fill a raised garden bed cheap on a budget?
- What are some ideas for inexpensive raised vegetable beds?
- Is it cheaper to build a raised garden bed or buy one?
- Are pallets safe to use for a raised garden bed?
- What is the best material for a cheap raised garden bed?
- How deep should a raised garden bed be?
- How much soil do I need for a 4×8 raised garden bed?
- What can I use instead of lumber for a raised bed?
- How long do cheap raised garden beds last?
- Build One Bed This Weekend
What Is the Cheapest Way to Make a Raised Garden Bed?
The cheapest way to make a raised garden bed is to build the frame from whatever rigid, food-safe material you can source for nothing, then cut the soil bill with a layered fill. Ranked cheapest to priciest, here are the eight methods that actually work.
- Free or reclaimed wood. Old lumber from a demolition salvage site, a landlord clearing a property, or a landscaping company restocking. Costs nothing, lasts as long as the wood is sound, and it is the only method where the frame itself is free.
- Cinder block. Concrete landscaping blocks in the standard 8x8x16 size, dry-stacked with no mortar and no fasteners. Inert, food-safe, and effectively permanent. A single wall of a 4×8 bed needs about 32 blocks.
- Cedar fence pickets. Narrow cedar boards slotted between four corner posts. Fence pickets cost less per linear foot than any framing lumber, which makes this the best-looking cheap frame you can build.
- Upcycled container. A galvanized feed trough, an old bathtub, a fabric grow bag, a wicker basket. Costs little or nothing and needs no cutting at all.
- Timber edging. Short landscape timbers or 4×4 posts driven into the ground as a retaining edge. Cheap, quick, and it looks tidy if you stagger the joints.
- Basic 2×6 lumber. Real framing lumber on edge, screwed to corner posts. The sturdier DIY option, and the one most beginners land on first.
- Corrugated metal or galvanized steel. Two sheets and four posts. The most expensive build, and the one that outlasts everything else on this list.
- A ready-made cedar or fir kit. Pre-cut, pre-drilled, corner hardware included. Convenient, and the priciest option per square foot by a wide margin.
| Build method | Frame cost | Fill cost | Total versus a kit | Lifespan | Tools needed | Looks like |
|---|---|---|---|---|---|---|
| Free reclaimed wood | Lowest | Low with layered fill | Cheapest by far | 3 to 10 years | Drill, saw | Rustic |
| Cinder block | Low | Low with layered fill | About 20 percent of kit | 50+ years | None | Industrial |
| Cedar fence pickets | Low to moderate | Moderate | About a third of kit | 10 to 15 years | Drill, saw | Clean and modern |
| Upcycled container | Low | Low | Cheapest per plant | 1 to 20 years | None | Depends on source |
| Timber edging with rebar | Moderate | Moderate | About half of kit | 10 to 20 years | Drill, hammer | Neat and horizontal |
| 2×6 lumber frame | Moderate | Moderate | About half of kit | 5 to 10 years | Drill, saw | Plain |
| Corrugated metal | Moderate to high | Moderate | About two thirds of kit | 20 to 50 years | Drill, rivet tool | Sharp and modern |
| Ready-made kit | Highest | Moderate | Baseline | 15 to 20 years | Usually none | Premium |
PRO TIP
Framing several small beds costs more in lumber, corner posts, and fasteners than framing two long beds. If your yard allows it, build one 4×4 and one 4×8 rather than three 4x4s, and you will cut your total frame cost noticeably without losing any growing area.
Cheap Raised Garden Bed Ideas by Material
Here are eight inexpensive raised garden bed ideas, cheapest first. Each one is a real build I have used or watched neighbours use, and each comes with the one trick that makes it work.
- Cinder block beds – no tools, no fasteners, permanent.
- Cedar fence picket beds – the best cheap frame that still looks good.
- 2×6 lumber beds – the sturdy DIY default.
- Pallet beds – free if you check the stamp.
- Timber edging beds – fast, tidy, cheap.
- Corrugated metal beds – pricier, but they last decades.
- Fabric and container beds – no frame at all.
- Ready-made kits – worth it only if you value the hour saved.
Cinder Block and Concrete Landscaping Block Beds
Cinder blocks are the single most-endorsed cheap option in every gardening forum I have read on this topic, and the reason is simple: concrete is inert, it will not rot, it will not leach, and you do not need a single tool to put it together.
The standard landscaping block is 8x8x16 inches. Lay them in a running bond like brickwork so the joints stagger, and interlock the rows with a piece of rebar driven through the cores. Fill the hollow cores as you go with soil, and plant aromatic herbs directly in them. A Gardening Forums thread described exactly this build, with lavender, nasturtium, and basil in the cores as a fragrant pest-deterrent border around the main bed.
You can also fill the cores with concrete to create a solid sill, though that adds weight you cannot move later. A user in the same thread noted the trade-off honestly: blocks are heavy and difficult to move if you ever want to change the layout. If you are not sure where the bed should go, test the footprint with a hose before you stack a single block.
GOOD TO KNOW
Some blocks are heavier than others. Split-face and half-high blocks cut the weight and also work as internal dividers inside a single bed, which is how you build a bed in sections over more than one season instead of filling it all at once.
Cedar Fence Picket Beds
Cedar fence pickets are the budget build we recommend most often, and the reason is unit cost. Fence pickets are narrow, so a 4×8 frame needs a shorter total run of board than a frame made from 2x6s, and cedar’s natural oils resist rot without any chemical treatment.
The trick is that fence pickets are too thin and too flexible to stand alone. They need four corner posts, and the boards slot into the posts rather than being nailed flat to them. Cut each picket to length, slide it into the post channel, and the frame holds its own shape.
Cedar weathers to a silver-grey within two or three seasons, so buy the greener boards knowing they will not stay that way. That is a feature, not a defect. It is the cheapest frame that still looks deliberate five years later.
Plain 2×6 Lumber Beds
Two-by-six lumber on edge, screwed to 4×4 corner posts, is the standard DIY frame and the one most build guides start with. It is stiffer than fence pickets, it is easy to source, and it takes any height you want because the corner posts carry the load.
The catch is cost, and users consistently call 2x8s and framing lumber cost-prohibitive when building several beds. If you go this route, buy 2x6s rather than 2x8s, buy untreated rather than pressure-treated, and pre-drill your pilot holes. Pre-drilling stops the screw from splitting the board at the end grain, which is the single most common way a cheap frame fails in its first winter.
Pallet Beds – Check the Stamp First
Pallets are everywhere and most are free, but the safety question comes up every single time, so here is the whole answer in one line. Look on the pallet for a stamp. HT means heat-treated and safe for food contact. MB means methyl bromide, which is a fumigant, not a contact preservative, and a stamped MB pallet is also fine. No stamp at all means unknown provenance, so use it as a liner or a base rather than as a wall touching your soil.
For a bed frame, stand pallets on their long edge as side panels, not flat on the ground. A flat pallet on soil becomes a habitat for slugs and a highway for voles.
A member on Gardening Forums pushed back on the blanket claim that all pallets are pressure-treated, and they had a fair point. Producers do not pay extra for treated lumber unless a buyer requires it, and some businesses end up with mountains of untreated pallets they turn into mulch. Check the stamp rather than assuming.
Timber Edging Beds
Timber edging, short treated or untreated timbers, or 4×4 posts cut to length and driven into the soil, is the fastest cheap build there is. You excavate a shallow trench, set the timber, backfill, and you have an edge. There is no corner joinery and no fasteners.
On Gardening Forums, a user on r/homestead described anchoring cheap timbers by drilling into them and driving rebar through them into the ground, and added the important caveat: it works for one or two beds high, but it is not enough if you need three or more courses stacked. Timber also has a natural taper, so turn the wide face of each timber toward the soil.
Corrugated Metal Beds
Corrugated galvanized steel sits near the top of the price range and outlasts everything else on this list by decades. Galvanized coating is food-safe, and steel does not rot, warp, or host wood-boring insects.
Two sheets and four corner posts is the whole build. The sheets are the expensive part, not the posts. If you want the look for less, check demolition salvage for old grain-bin panels or roofing sheets, and watch for rust at any fastener holes.
One genuine downside: metal conducts heat and cold straight to the root zone. In an Edmonton winter, line the inside with cardboard before filling.
Fabric and Container Beds
Fabric grow bags skip the frame entirely. They are the cheapest raised bed per plant, they drain well, and they warm quickly in spring because there is no thick wooden wall holding cold. Their weakness is volume: a standard bag holds far less soil than a 4×8 bed, so you are watering more often than any other method here.
If you are growing in containers, buy the largest pot you can move rather than several small ones, and fill the bottom third with something cheap and coarse before the soil. Full details are in the upcycled section below.
Ready-Made Kits
Kits from brands like Birdies, Vego, Greenes, and the mass-market metal bed sellers are the right call for exactly two situations: you have no tools, or you want the bed assembled in an hour. The corner hardware and pre-drilled boards are the actual product, and that convenience is what you are paying for.
Skip a kit if you already own a drill and a saw, or if you can source the same cedar locally. The full cost comparison is further down.
Free and Recycled Materials: Where to Actually Find Them
Free materials are the truest version of cheap, and most of the work is in the sourcing rather than the build. Here is where Edmonton gardeners actually find things.
- Freecycle groups. Post a wanted listing with your dimensions and your pickup deadline. Demolition leftovers, deck planks, and raised-bed frames turn up regularly.
- Craigslist Free. Search under free, garden, and landscaping. Landscapeers list offcuts and site-cleared lumber here after every job.
- Demolition salvage yards. The single best source for old structural lumber. You pay a small fee per load and sort through everything yourself.
- Building supply drop-offs. Many stores will donate or discount leftover lumber that is too short for a full order or has cosmetic damage.
- Farm and ranch suppliers. Feed and livestock stores accumulate pallets, crates, and bulk bags constantly and often have no use for them.
- Municipal compost and yard waste programs. The city compost site and the yard waste depot are free or low-cost sources of both compost and brown filler material.
EXPERT TIP
Ask one question before you load the truck: what was this wood used for, and has it been treated? A packing crate, a demolished deck, and a railway component are three very different risk profiles. The person handing it over usually knows and will tell you if you ask directly.
How to Fill a Raised Bed Without Buying a Pile of Soil
You can fill a raised bed on a budget with a one-third-one-third-one-third mix of topsoil, compost, and an aeration amendment, then cut the purchased volume by a third to a half with hugelkultur layers in the bottom. This is where the real savings live, because soil frequently costs more than the frame.
Do the volume math first
Multiply length by width by depth in feet to get cubic feet, then divide by 27 to get cubic yards. One 4×8 bed filled to 12 inches needs about 32 cubic feet, which is roughly 1.2 cubic yards. Bulk delivery is priced by the yard, which is where the gap opens: bagged soil is sold by the two-cubic-foot bag, and the per-cubic-foot price is several times higher once you include delivery on a bulk load.
| Bed size | Depth | Cubic feet | Cubic yards | Relative fill cost |
|---|---|---|---|---|
| 4×4 | 6 inches | 8 | 0.3 | Lowest |
| 4×4 | 12 inches | 16 | 0.6 | Low |
| 4×4 | 18 inches | 24 | 0.9 | Moderate |
| 4×8 | 6 inches | 16 | 0.6 | Low |
| 4×8 | 12 inches | 32 | 1.2 | Moderate |
| 4×8 | 18 inches | 48 | 1.8 | High |
| 4×12 | 12 inches | 48 | 1.8 | High |
| 4×12 | 18 inches | 72 | 2.7 | Highest |
The one-third-one-third-one-third mix
One third quality topsoil, one third finished compost, one third aeration amendment such as perlite, coco coir, or peat moss. This is the standard raised-bed recipe and it drains well enough to prevent root rot while holding enough moisture to survive a dry spell.
If you are on the tightest possible budget, drop the perlite and replace it with screened topsoil, and buy your compost from the municipal site rather than a bagged product. You lose a little drainage, which matters more in a 6-inch bed than an 18-inch one.
Hugelkultur: fill the bottom with logs
Hugelkultur means building a mound inside your frame. Lay whole logs, branches, and yard debris in the bottom third, then cap them with 12 inches of your good mix. It cuts purchased soil by 30 to 50 percent, and over two to three years the wood robs, compacts, and feeds the bed from below.
An Instagram post with well over 200 thousand likes showed the definitive budget version of this, a U-shaped bed built from hollow concrete blocks, cardboard, old logs, pine trimmings, compost, and topsoil, producing vegetables through a full season. That build is essentially free if you have a chipper or a supply of branches.
- Cardboard sheets on the bare ground to smother weeds.
- Whole logs and thick branches packed tightly across the bottom.
- Twigs, small branches, and pine trimmings on top of the logs.
- A layer of grass clippings or fall leaves to fill the gaps.
- Twelve inches of your topsoil-compost-amendment mix on top.
GOOD TO KNOW
Top up hugelkultur beds every spring with a couple of inches of fresh compost. The bed will settle noticeably in the first year, and that is normal.
The lasagna method
Sheet mulching, or the lasagna method, builds the bed in layers of organic material instead of buying soil: cardboard or newspaper, then greens and coffee grounds, then browns such as shredded leaves, then manure, then a thick top layer of compost and topsoil. It costs very little because most layers come from your own kitchen and yard.
It is slower than a triple mix. Plan on it being productive the following season rather than the first one, and keep it damp or the layers will simply dry out.
Bulk versus bagged
Anywhere in the region that sells by the cubic yard will almost always beat the per-cubic-foot bag price once you are buying more than about a yard. A single bag is convenient, but a pallet of bags costs several times what the same volume costs delivered. Arrange delivery before you start building so the pile lands where the bed is going.
Step-by-Step: The Cedar Fence Picket Raised Bed
This is the build I recommend to anyone starting out, because it is forgiving, it looks good, and it can be done in an afternoon with a drill and a saw.
Materials
- Four 4×4 corner posts, 36 inches long
- Cedar fence pickets, 1×6 or 2×6, enough to run the perimeter
- Exterior-grade screws, 3 inch
- Two pieces of rebar, 36 inches, for anchoring
- Stiff cardboard to line the inside
- One roll of hardware cloth, half-inch mesh, for the base
Cut list for a 4×8 bed
- 2 pieces at 48 inches for the short ends
- 2 pieces at 96 inches for the long sides
- 2 pieces at 24 inches for a mid-span brace on each long side
Assembly
- Mark the footprint. Lay out a 4-foot by 8-foot rectangle and confirm it is reachable from all sides. Shift it now, not after you have built it.
- Set the posts. Dig four holes roughly 8 inches deep, set the posts plumb, and backfill. The posts hold the frame, so this is the step worth doing carefully.
- Slide the boards. Slot each picket into the post channel, working along one long side, then the short sides, then the second long side. A rubber mallet and a helper make this fast.
- Add the braces. Screw the 24-inch braces to the middle of each long side. This is what stops a long wall from bowing outward under wet soil pressure.
- Anchor. Drill pilot holes through the lower boards and drive rebar down into the soil, one at each post and one at each brace. Unanchored frames bow and spread, and this is the most reported failure in cheap builds.
- Line the base. Lay cardboard on the ground inside the frame and staple hardware cloth over it for gopher protection. Cut a corner flap so nothing tears.
PRO TIP
Order two boards more than you think you need. Cedar fence pickets vary in actual length by half an inch or more, and a short board at the end of a wall is the most common reason a frame does not close cleanly.
Building Your Bed in Sections, One Season at a Time
If the soil bill is the reason you are hesitating, build the bed in sections rather than all at once. This is the single most useful technique from the forum discussions on this topic, and almost nobody has written it up properly.
The method: use thin or half-high concrete blocks as internal dividers inside a single large frame. A user on Gardening Forums described running narrower blocks through the middle of a bed to compartmentalize it into square-foot-garden cells, and that same move solves the budget problem. You fill one section properly this spring, plant it, and fill the next section in the fall or the following spring using compost you have generated in the meantime.
- Build the full outer frame first so the structure is complete and square. This is the part that needs tools, and doing it all at once avoids twice the labour.
- Lay internal dividers of half-high or split-face blocks, leaving a few inches of gap at each end so water can still move between cells.
- Fill only the first cell. Plant it. A partly filled bed still functions as a bed, and the empty cells cost you nothing to leave open.
- Add a cardboard sheet over the empty cells to keep weeds down and stop the soil from washing across.
- Fill the next cell the following season with a mix you have made yourself from last year’s compost and this year’s leaf mulch.
The same logic applies to lumber frames if you leave the middle bays empty and use a removable board as a temporary divider. The bonus nobody mentions: those internal dividers are exactly the square-foot-garden cells that stop tomatoes and squash taking over half the bed.
GOOD TO KNOW
A sectioned build is also the way to test whether you actually enjoy this before committing to a whole yard of beds. One filled cell is a fair trial run at a fraction of the soil cost.
How Much a Cheap Bed Gives Back Over a Season
People rarely run this calculation, and it is the most persuasive argument for building rather than buying. Consider a 4×8 bed, which is 32 square feet of growing surface, and price it against the produce it gives back.
A square foot of well-managed raised bed soil can produce a meaningful weight of vegetables across a season, and leafy greens, radishes, and bush beans yield in repeated harvests rather than one cut. Over a full season of good succession planting, a single 32-square-foot bed is a serious volume of food, and every pound of it is produce you did not have to buy.
The payback math is simple once you stop framing it as a percentage. If your bed pays for itself in produce in the first season, every year after that is free food. If it takes two seasons, it still pays back. The only scenario where it never pays back is a bed that is never planted, and that failure has nothing to do with the frame you chose.
Which is the practical argument for the cheapest frame that will actually survive freeze and thaw. A cedar frame you can afford and will fill beats a metal frame you cannot.
Sizing Your Bed So It Does Not Bow
Keep raised beds four feet wide or narrower, and match depth to what you intend to grow. Four feet is the width you can reach into from both sides without stepping on the soil, and stepping on the soil compacts it and crushes roots.
| Depth | Best for | Notes |
|---|---|---|
| 6 inches | Radishes, lettuce, spinach, peas, shallow-rooted herbs | Cheapest to fill, dries out fastest |
| 8 to 10 inches | Leafy greens, herbs, onions, strawberries, bush beans | The sweet spot for most home beds |
| 12 inches | Tomatoes, peppers, zucchini, most vegetables | The default depth, and the most forgiving |
| 18 inches | Carrots, parsnips, potatoes, long-rooted crops | Best for cold-climate root crops |
| 24 inches and up | Perennial beds, dwarf trees, mixed plantings | Needs serious bracing |
Height is where cheap frames fail. A single course of blocks or a 12-inch board wall holds soil pressure easily. Every additional course multiplies the sideways load, and wet soil in spring is heavy and acts like a fluid pushing outward.
The rules I use: keep free-standing walls at 12 inches unless you brace them, treat 24 inches as the practical ceiling for an unbraced cheap build, and rebar through the courses above 12 inches. Beyond that, build a 4×4 square rather than a long wall, because a square resists racking in every direction.
On a patio or in concrete, a bed needs drainage holes. Drill a row of holes in the base of any container bed, or set it on feet, or roots will sit in water and rot.
Treated Wood, Pallets and Railroad Ties: What Is Actually Safe to Eat From
Pallets are safe to use for a raised garden bed if the stamp says HT or MB, and they are not safe to assume if there is no stamp at all. That is the whole decision rule. Everything else in this section is context.
- HT (heat-treated) means the wood was heated rather than chemically saturated. There is no residual preservative, and it is the stamp you want to see.
- MB means fumigated with methyl bromide, which leaves no contact residue. Also fine.
- No stamp means unknown. Use it as a base, a liner layer, or a trellis support, not as a wall touching your soil.
- Green tint is the visual tell for pressure-treated lumber containing copper-based preservatives. It is generally considered safe for an above-ground bed, but not one you line and plant directly against.
- Railroad ties are creosote-treated. Creosote contains polycyclic aromatic hydrocarbons, which are linked to cancer in people. Do not use railroad ties for anything edible.
The cheapest safe version of a reclaimed wood bed is: line the inside wall with cardboard or heavy garden fabric, so the wood never touches the root zone directly, and keep the reclaimed material on the outside where it belongs.
GOOD TO KNOW
The central frustration in every forum discussion on this topic is that cheap and toxin-free are hard to get at the same time. You can fix that tension with two decisions: verify the stamp, and line the interior. Together they let you use free wood without guessing.
Upcycled Container Beds That Cost Almost Nothing
Container beds skip the framing problem entirely, and several of these cost nothing at all.
- Galvanized feed troughs. Inert, food-safe, and sized close to a raised bed footprint. Drill drainage holes in the base before you fill them.
- Old bathtubs. Deep, free, and oddly charming once painted. A clawfoot tub in a fenced yard is a conversation piece.
- Half-barrels buried in the ground. A user on Gardening Forums reported this works well as a raised bed, with only the top few inches showing.
- Fabric grow bags. The cheapest per plant. Fill the bottom third with empty plastic bottles or corks to save soil, then keep the rest of the bag empty or rolled as a collar.
- Wooden crates. Free from local companies and restaurants, per multiple Gardening Forums replies. Line them with landscape fabric or cardboard so the slats do not leak soil.
- Wicker baskets and half-barrels. Cheap, portable, and they move easily when you want to rearrange, which is the one thing block beds cannot do.
PRO TIP
Avoid plastic storage bins as permanent beds. Forum users consistently report that plastic containers go brittle and crack after a couple of seasons, and UV exposure in a south-facing yard speeds that up. Use them for seedlings and let them retire.
The aesthetic question comes up constantly, so address it directly. Paint cinder blocks a neutral tone, plant marigolds or creeping thyme in the cores, and raw concrete stops looking unfinished. Reclaimed wood looks better with age than most garden furniture does.
Cold Climate Raised Beds for Edmonton Growers
Edmonton sits in zone 3b, which is why cold-climate advice is worth more here than anywhere else in this article. A raised bed warms earlier than open ground because the soil volume is small, insulated by the frame, and never shaded by a full canopy. In a typical year that buys you two to four extra weeks at each end of the season.
- Start earlier with a cold frame. A simple hoop house over the bed lifts the effective temperature and takes the last frost out of the equation for transplanting.
- Insulate the north side. Rigid foam board or a double layer of straw against the wall that faces away from the sun costs almost nothing and protects roots from the worst swings.
- Fill deep. Eighteen inches is worth the extra fill cost here. Deeper soil buffers freeze and thaw better than a shallow bed does, and root crops need it anyway.
- Skip bare soil in winter. A covered or mulched empty bed loses more heat than one with roots or a layer of leaves in it.
- Add row cover early and leave it on late. Floating row cover on a light frost does more for a cold-climate bed than any other single purchase.
Freeze and thaw is the real enemy, more than cold itself. Soil that repeatedly freezes and thaws heaves and heaves the frame with it. Anchoring with rebar, as described earlier, matters more in this climate than in a mild one.
A member of a Facebook gardening group put the whole ethos plainly: keeping it simple and inexpensive is the goal, not a compromise. That is the right starting posture for a zone 3b bed.
Watering on a Budget
Raised beds dry out faster than open ground, and the cheapest fix is not a hose timer. It is gravity.
- Soaker hose on a timer. Cheapest per season of anything that automates watering.
- Drip line at 6 to 12 inch spacing. Add a pressure regulator and a backflow preventer so you do not blow out the emitters.
- Buried bottle irrigation. Fill a container with holes punched in the cap, bury it neck-down beside each plant, and let it drip slowly. Works, but it is a weekend project rather than a setup.
- Mulch 2 to 3 inches deep. The single highest-return water saving, and it also cuts weeding.
Water deeply and less often. Shallow daily watering keeps the root zone wet and the bottom dry, which is exactly backwards.
What to Plant in a Cheap Bed for the Best Return
If you are counting on the bed to pay for itself, plant by yield and by days-to-maturity rather than by what looks interesting. Leafy greens, radishes, bush beans, cherry tomatoes, and herbs give the most food per square foot and per dollar of seed.
Run two successions instead of one. A quick radish and lettuce crop in early summer clears in under 40 days, which leaves room for fall brassicas sown in late July. Succession planting means the same bed produces twice, and it is free.
Go vertical for cucumbers, peas, and indeterminate tomatoes on a simple lattice or net fixed to the back of the frame. Vertical space is the only space in a small yard that costs nothing to add.
Keep the soil biology fed with a thin compost layer each spring, and rotate plant families so a bed is not carrying the same soil-borne problem three years running.
Is It Cheaper to Build or Buy a Raised Garden Bed?
Building is typically 40 to 60 percent cheaper than buying a comparable kit, once you account for the fact that a kit charges you for corner hardware, pre-drilling, and a single hour of your time. Build if you own a drill and a saw. Buy if you do not, or if the bed has to be perfect with no rework.
| Factor | Building it yourself | Buying a kit |
|---|---|---|
| Upfront cost | 40 to 60 percent less | Higher |
| Time to first bed | Half a day, more for larger frames | About an hour |
| Tools required | Drill and saw at minimum | Usually none |
| Custom size | Any size you want | Fixed sizes |
| Depth options | Any height, within bracing limits | One standard height |
| Soil options | Insulated, inert, or rustic as needed | Usually cedar or fir |
| Repairs | Replace a single board | Depends on the brand |
The brands that dominate the shopping results, like Birdies, Vego, Greenes, and the metal bed brands such as VEIKOUS and VEVOR, are all reasonable choices. None of them is cheaper than framing it yourself, and the difference is a few hours of work rather than a fundamentally different product.
Here is the honest exception: if you are building a 4×8 or larger bed in cedar and you already have to buy the lumber, the gap narrows. Big cedar beds have a lot of board in them. For a 4×4, build. For several large cedar beds with no tools, a kit buys you real time.
Tools You Can Skip
Not every cheap build needs a workshop. Cinder block beds need nothing. Feed troughs, bathtubs, and fabric grow bags need only a drill for drainage holes. Timber edging needs a shovel, a post driver or a rubber mallet, and nothing else.
What you cannot skip is a fastener of some kind for any wood frame. If you own no drill, the cinder block build and the container build are your two options, and both are genuinely good ones.
Common Mistakes That Ruin Cheap Beds
Most failed budget beds fail for the same handful of reasons, and none of them are about the material.
- Building too wide. Anything past four feet means you cannot reach the centre, so you will step on the soil and compact it.
- Skipping the interior liner. A cardboard or fabric liner separates your soil from unknown wood, and it costs almost nothing.
- Skipping the base barrier. Hardware cloth at half-inch mesh is the difference between keeping gophers out and losing a season’s carrots.
- Not anchoring the frame. Unanchored frames bow and spread under wet soil pressure. Rebar through the posts fixes it for the cost of a couple of lengths of steel.
- Buying bagged soil out of convenience. The per-cubic-foot price on bagged soil is the most common place a cheap bed quietly stops being cheap.
- Skipping aeration. Pure topsoil and pure compost both compact. The third of the mix is what keeps water moving and prevents root rot.
- Forgetting to mulch. Mulch cuts watering and weeding at the same time, and it is cheaper than either.
- Pouring concrete into block cores. It looks tidy and it makes the bed immovable. Fill the cores with soil and herbs instead.
- Using railroad ties. Creosote is not a material to eat from, at any budget.
Frequently Asked Questions
What is the cheapest way to make raised garden beds?
The cheapest way is to build the frame from free reclaimed wood or cinder blocks, dry-stacked or screwed together, then fill with a hugelkultur layer and a one-third-one-third-one-third mix of topsoil, compost, and an aeration amendment. A 4×8 bed framed from reclaimed sources costs close to nothing beyond your time, and a cinder block frame runs a fraction of any ready-made kit.
How do I fill a raised garden bed cheap on a budget?
Fill the bottom third with logs, cardboard, and yard debris, then cap it with 12 inches of a mix that is one third topsoil, one third compost, and one third perlite, coco coir, or peat moss. This hugelkultur method cuts purchased soil by 30 to 50 percent. Buy by the cubic yard rather than by the bag, since bulk is several times cheaper per cubic foot once you need more than about a yard.
What are some ideas for inexpensive raised vegetable beds?
Cinder blocks dry-stacked with no tools, cedar fence pickets slotted between corner posts, basic 2×6 lumber on edge, pallet panels checked for an HT stamp, short timber edging driven into the ground, corrugated galvanized steel, and upcycled containers such as galvanized feed troughs, old bathtubs, and fabric grow bags. All of these work in a cold climate; metal beds just need an interior cardboard liner to protect roots from temperature swings.
Is it cheaper to build a raised garden bed or buy one?
Building is typically 40 to 60 percent cheaper than buying a comparable kit, because a kit charges you for corner hardware, pre-drilling, and an hour of your time. Build if you own a drill and a saw. Buy a kit if you have no tools, or if you are building several large cedar beds where the lumber cost narrows the gap considerably.
Are pallets safe to use for a raised garden bed?
Yes, if the stamp says HT, meaning heat-treated with no residual chemical preservative, or MB, meaning fumigated. If there is no stamp at all, the provenance is unknown, so use that pallet as a base or liner instead of a wall touching your soil. Standing pallets on their long edge as side panels also keeps them away from ground-level pests.
What is the best material for a cheap raised garden bed?
Cinder blocks are the best value overall because concrete is inert, food-safe, needs no tools, and effectively never wears out. Cedar fence pickets are the best-looking option, at low cost per linear foot, but they need corner posts. If you can source free reclaimed wood, that is the cheapest of all, provided you verify it was not creosote-treated and you line the interior.
How deep should a raised garden bed be?
Six inches is enough for radishes, lettuce, and peas. Twelve inches is the default for tomatoes, peppers, and most vegetables, and 18 inches is worth the extra fill cost in a cold climate because deeper soil buffers freeze and thaw better and gives carrots, parsnips, and potatoes the room they need.
How much soil do I need for a 4×8 raised garden bed?
Multiply length by width by depth in feet to get cubic feet, then divide by 27 for cubic yards. A 4×8 bed filled to 12 inches needs about 32 cubic feet, which is roughly 1.2 cubic yards. Filled to 18 inches it needs about 48 cubic feet, or 1.8 cubic yards.
What can I use instead of lumber for a raised bed?
Concrete landscaping block in the 8x8x16 size is the most durable substitute, dry-stacked with no fasteners and effectively permanent. Corrugated galvanized steel is the other option, and it outlasts wood by decades. Upcycled containers such as galvanized feed troughs, old bathtubs, half-barrels, and fabric grow bags need no frame at all. Avoid railroad ties, which are creosote-treated.
How long do cheap raised garden beds last?
Cinder block beds effectively never wear out, and galvanized steel lasts 20 to 50 years. Cedar fence pickets last 10 to 15 years, untreated 2×6 lumber 5 to 10 years, and reclaimed wood anywhere from 3 to 10 years depending entirely on its condition. Fabric grow bags need replacing each season or two, and plastic storage bins tend to crack within a couple of seasons in direct sun.
Build One Bed This Weekend
Cheap raised garden bed ideas all come down to three decisions: source the frame creatively, cut the soil bill with layers, and verify anything reclaimed before it touches your food. Pick one method from the ranked list above and build a single 4×4 before you plan a whole yard.
- Measure first. Four feet wide, 12 inches deep, and positioned so you can reach the centre from every side.
- Source the frame. Check Freecycle, Craigslist Free, and a demolition salvage yard before you buy a single board. Cinder blocks are the fallback when nothing free turns up.
- Order soil in bulk and plan a hugelkultur base so you need a third less of it than the calculator says.
- Line it, anchor it, mulch it. Cardboard inside, rebar through the posts, two inches of mulch on top.
Next spring you will already have soil that is better than anything you could dig, a bed that warms weeks early, and a frame that cost a fraction of what the same bed would have cost in the store. That is the whole argument for cheap raised garden bed ideas, and it holds up in any climate.