
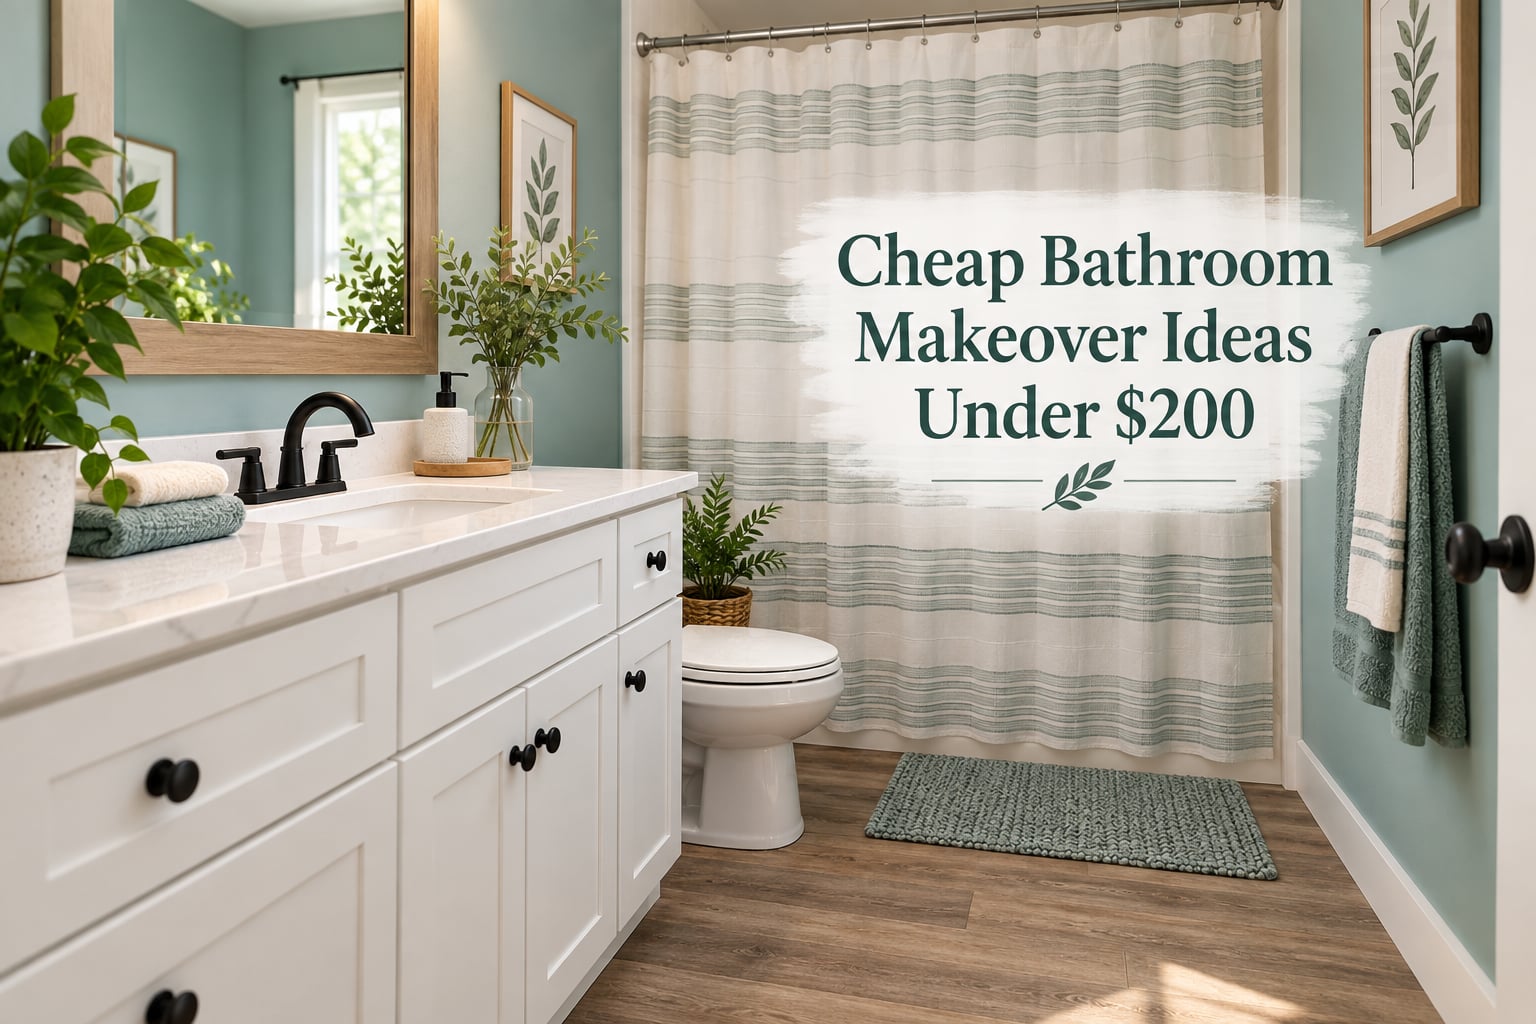
Two hundred dollars, one weekend, and no contractor. That is the whole premise behind this guide to cheap bathroom makeover ideas under 200 dollars: you change how the room looks by working on the surface, not inside the walls.
No demolition, no plumbing, no permits, and nothing that limits what the next owner can do. Paint, a new mirror, brighter lighting, swapped hardware, peel-and-stick floor tile, fresh textiles, and storage you sourced secondhand. Every line gets a number so the total actually lands at or under 200 dollars instead of the 600-plus figure some guides quietly admit to.
Our site audience skews heavily toward renters and first-time buyers, so every idea below carries a difficulty rating, a weekend-time estimate, and an honest label for whether a landlord would be fine with it.
Table of Contents
- What Is the Least Expensive Way to Remodel a Bathroom?
- How to Split a 200-Dollar Bathroom Budget
- 10 Bathroom Makeover Ideas Under 200 Dollars
- 1. Repaint the walls in a light-reflecting shade
- 2. Hang a bigger mirror
- 3. Swap the vanity light
- 4. Replace all the hardware in one go
- 5. Lay peel-and-stick vinyl on the floor
- 6. Add a peel-and-stick backsplash panel
- 7. Hang a new shower curtain on the existing rod
- 8. Layer your lighting
- 9. Add storage you sourced secondhand
- 10. Retextile the whole room
- Step-by-Step: Installing Peel-and-Stick Floor Tile
- Step-by-Step: The Paint and Hardware Swap Weekend
- Renter-Friendly Bathroom Ideas That Reverse Cleanly
- Where Edmonton and Alberta Shoppers Find the Cheapest Materials
- What to Skip Under 200 Dollars
- Small Bathroom Trends Worth Copying on a Budget
- Three Budget Tiers and How Long Each One Takes
- Humidity-Safe Materials and the Vent Fan Check
- Frequently Asked Questions
- What is the least expensive way to remodel a bathroom?
- What is the cheapest way to modernize my bathroom?
- What are some DIY bathroom remodel ideas on a budget?
- What are some trendy ideas for small bathrooms in 2026?
- Can you remodel a bathroom for under 200 dollars?
- Is peel and stick tile good for bathroom floors?
- Conclusion
What Is the Least Expensive Way to Remodel a Bathroom?
The least expensive way to remodel a bathroom is to skip the room’s guts entirely. Repaint the walls, replace the shower curtain, swap the towel bar and cabinet knobs, and hang a larger mirror. No demo, no plumbing, no permits, and it usually lands somewhere between 40 and 80 dollars for a change people notice immediately.
That answer works because every one of those jobs is reversible and takes a couple of hours. The visible problem in most dated bathrooms is surface-level, so surface-level fixes do most of the work.
How to Split a 200-Dollar Bathroom Budget
Here is the exact allocation we use when we plan a 200-dollar refresh. The running total column is the part most guides leave out, and it is the part readers ask for the most.
| Line item | What it covers | Cost (dollars) | Running total |
|---|---|---|---|
| Paint and supplies | One gallon wall paint, one gallon for the ceiling, primer, roller, tray, drop cloth, tape | 55 | 55 |
| Peel-and-stick vinyl floor tile | Bathroom-rated vinyl plank or tile, measured plus 10 percent extra | 45 | 100 |
| Mirror | A wider or taller framed mirror that reflects more light back into the room | 20 | 120 |
| Lighting | One warm LED bulb or a single vanity fixture, plus a smart bulb if you already have a fixture | 18 | 138 |
| Hardware set | Matte black or brushed nickel knobs, towel bar, and hook, bought as one set | 20 | 158 |
| Shower curtain and liner | New curtain on the existing rod, plus a fresh plastic liner if yours is stained | 20 | 178 |
| Textiles and window film | Bath rug, matching towel set, frosted privacy film for the window | 17 | 195 |
| Storage and greenery | A thrifted basket or shelf plus a hardy plant | 5 | 200 |
If you have less than 200 dollars, cut in this order: window film first, then the second coat of ceiling paint, then swap the light bulb instead of the fixture. Do not cut the mirror or the hardware. Those two carry more visual change per dollar than anything else on the list.
10 Bathroom Makeover Ideas Under 200 Dollars
These are ranked by visual impact per dollar, which simply means the change the room shows for the money spent. I have kept the total of everything below under 200 dollars, so you can pick freely.
1. Repaint the walls in a light-reflecting shade
Cost: 35 to 55 dollars. Difficulty: 1 star. Time: 4 to 6 hours plus drying. Renter-friendly: only with landlord sign-off.
Warm white, soft greige, and pale sage do more for a small bathroom than any fixture swap. A light-reflecting paint bounces daylight and the new brighter bulb around the room, so the walls read as cleaner even before you touch anything else.
2. Hang a bigger mirror
Cost: 15 to 20 dollars at a dollar store or thrift store. Difficulty: 1 star. Time: 30 to 60 minutes. Renter-friendly: yes, if you use removable hangers or Command-style strips rated for the weight.
One large mirror over a small vanity fixes two problems at once. It makes the room feel wider, and it doubles the light coming back off the wall opposite the window. This is the single highest-impact dollar in the whole budget.
3. Swap the vanity light
Cost: 10 to 18 dollars for a warm LED bulb, more for a complete fixture. Difficulty: 2 stars if you touch wiring, 1 star if you only change a bulb. Time: 15 minutes to 1 hour. Renter-friendly: bulb only, yes.
Most bathrooms run cool blue-white bulbs from a previous decade, which is why they feel gloomy even after painting. A warm white bulb around 3000K is the cheapest fix in the house. If you do replace the whole fixture, always shut the breaker off first.
4. Replace all the hardware in one go
Cost: 15 to 20 dollars for a matched set. Difficulty: 1 star. Time: 1 hour. Renter-friendly: with landlord sign-off for anything screwed into drywall.
Mixing finishes is what makes a bathroom look pieced together. Buy the knobs, towel bar, and hook as a single set in matte black or brushed nickel, then match the shower curtain hooks to the same finish. The change reads as a design decision rather than a repair.
5. Lay peel-and-stick vinyl on the floor
Cost: 40 to 50 dollars for a small bathroom. Difficulty: 2 stars. Time: one afternoon. Renter-friendly: yes, it peels off cleanly.
This is the most-asked question in the top community thread on this topic, and for good reason. A dated floor is the first thing your eye lands on. Peel-and-stick vinyl gives you a wood-look or stone-look floor in an afternoon with no grout, no spacers, and no adhesive cure time. The full walkthrough is below.
6. Add a peel-and-stick backsplash panel
Cost: 15 to 20 dollars. Difficulty: 1 star. Time: 1 to 2 hours. Renter-friendly: yes.
The same product that covers the floor covers the wall behind the vanity or the tub surround. Fluted, ribbed, and stacked-stone panels in warm tones read as current and add texture that flat paint cannot.
7. Hang a new shower curtain on the existing rod
Cost: 15 to 25 dollars. Difficulty: 1 star. Time: 10 minutes. Renter-friendly: yes.
Replace the curtain and the liner together, and leave the old rod in place. This is the fastest visible change in the room, and it costs less than dinner out.
8. Layer your lighting
Cost: 10 to 15 dollars. Difficulty: 1 star. Time: 30 minutes. Renter-friendly: yes.
One overhead light leaves corners dark. A warm LED strip under the vanity or a small wall sconce on an adhesive plate fills those corners, and layered lighting is the difference between a lit room and a flattering room.
9. Add storage you sourced secondhand
Cost: 0 to 5 dollars. Difficulty: 1 star. Time: 20 minutes. Renter-friendly: yes.
A thrifted basket, a floating shelf, or an over-the-toilet ledge gives you somewhere to put things without cutting into walls. A cluttered bathroom looks smaller than an empty one, so storage is a visual upgrade as much as a practical one.
10. Retextile the whole room
Cost: 15 to 25 dollars. Difficulty: 1 star. Time: 15 minutes. Renter-friendly: yes.
A new bath rug and a matching towel set in one colour, plus a hand towel on the new hook, tie the room together. Coordinate everything to two or three finishes and the room looks deliberate rather than assembled over a decade.
Step-by-Step: Installing Peel-and-Stick Floor Tile
This is the highest-impact job in the plan, and the one most readers ask about. Budget a full afternoon, keep the room dry, and work with the room at room temperature.
- Measure twice, buy 10 percent extra. Measure the floor length and width and multiply for square footage, then add 10 percent for trimming and mistakes.
- Let the planks acclimate in the room for 72 hours. Vinyl that changes temperature while it is being laid will not bond properly. Keep the bathroom dry and around 20 to 22 degrees during this period.
- Check the backing is waterproof rated for bathrooms. Look for a product labelled for bathroom or wet-room use. Standard peel-and-stick floor tile is not the same as the peel-and-stick wall panels, and only the bathroom-rated one belongs on a floor.
- Pull up the old floor covering if there is one. Every scrap of old adhesive is a weak spot later.
- Clean, dry, and level the subfloor. Vacuum, mop, and let it dry completely. Fill any gouges with a patching compound. Adhesive will not bridge a dip.
- Dry-lay the first row before you peel anything back. Work from the most visible wall outward, staggering the seams between rows.
- Peel the backing as you go and press firmly. Use a flat board or a squeegee across each plank to push out air bubbles. Wait 24 to 48 hours before wetting the floor.
- Add baseboards or trim back on after. Trim hides the gap at the edges where the new floor meets the old wall.
One honest caveat on durability. Peel-and-stick floor tile is a good fit for a powder room, a guest bath, and a rental where the floor needs to come up later. In a primary shower-adjacent room with a lot of standing water, the grout and waterproofing under the old floor matter more than the surface, and a proper membrane is not a 200-dollar purchase.
Step-by-Step: The Paint and Hardware Swap Weekend
Combined, these two jobs are where most of the visible change comes from, and they fit inside a single weekend.
- Saturday morning, prep. Patch nail holes, sand the scuffs with 120-grit, wash the walls, and tape your trim. Run an acrylic caulk bead along the wall and tub joint to stop moisture wicking into fresh paint.
- Saturday morning, prime. Primer on bare patches and over any stain, then one or two coats of your chosen colour with a roller, not a brush, on the wall field.
- Saturday evening, let it dry. Bathroom paint needs longer than other rooms because of the humidity, and a fan on high helps.
- Sunday, hardware. Remove the old knobs, towel bar, and hook, patch the holes with filler, and install the new set. A cheap level and a stud finder keep the towel bar straight.
- Sunday, hang and text. New mirror, new shower curtain, new rug, new towels.
- Sunday, reset. Put everything back, sweep, and take a before photo first so you have the comparison later.
Renter-Friendly Bathroom Ideas That Reverse Cleanly
Renter-friendly means adhesive or tension-mounted only, with no drilling, no plumbing work, and no painting unless your landlord has agreed to it in writing. If you are renting in Edmonton, a written yes protects your damage deposit far better than a verbal one.
Safe without permission: peel-and-stick floor tile, peel-and-stick wall panels, a new shower curtain on the existing rod, a tension rod for extra shelving, over-the-door hooks, removable mirror strips, a thrifted shelf, new textiles, and a warm LED bulb.
Needs landlord sign-off: painting walls, replacing a light fixture, drilling for a new mirror or towel bar, or anything that touches the plumbing.
If a landlord refuses the main two jobs, you can still spend the full 200 dollars. Peel-and-stick floor tile plus a peel-and-stick backsplash, a thrifted or dollar store mirror, a matched hardware set, a new curtain, layered lighting, and textiles will still read as a completely different room.
Where Edmonton and Alberta Shoppers Find the Cheapest Materials
Sourcing is where a 200-dollar plan actually gains ground. The top community posts on this topic are full of people who sourced from secondhand channels rather than retail, and it is the cheapest part of the budget when it works.
- Dollar stores for mirrors, curtain hooks, storage baskets, shower caddies, matching towel sets, and planters. This is where the framed mirror in idea number two usually comes from.
- IKEA Edmonton for towel rails, hooks, shelving, and storage. End-of-line and display pieces move through the clearance aisle and are often the better buy.
- Home Depot and Lowe’s clearance for paint, flooring, and light fixtures. Odds are better mid-season and at the end of a month, and discontinued fixture shades are frequently marked down hard.
- Kijiji and Facebook Marketplace for a used vanity, mirror, or light fixture. The runner-up result on the main search was a before-and-after post where most items came from Marketplace, and that is not a coincidence.
- Thrifting for frames, baskets, brass candlesticks, and glass jars. Budget 0 to 5 dollars here and treat anything above 15 dollars as a miss.
Buy the fixtures together. Ordering a matched set in one trip usually costs less than buying a towel bar, two knobs, and hooks separately over three trips.
What to Skip Under 200 Dollars
Some projects look cheap on paper and are not. These are the ones where the dollars go and the room does not visibly change, or where the job quietly costs five times the estimate.
- Full ceramic or porcelain floor tile. Material plus adhesive plus grout plus a waterproof membrane plus labour. The materials alone blow the budget.
- A shower surround replacement. It is a plumbing-adjacent job, it needs a proper pan and waterproofing, and a partial job looks worse than the one you replaced.
- Frameless glass shower doors. These are measured, custom, and priced in the hundreds. One budget guide on this topic cites a glass door at under 600 dollars while writing a 200-dollar headline, which is the kind of thing that erodes trust.
- A new vanity, sink, or faucet. Plumbing rough-in, wall cuts, and supply line work push this well past the ceiling, and a mismatched new vanity in an old room can look worse than what you replaced.
- Recessed shower niches. That means cutting into the wall and waterproofing the cut.
- Structural layout changes. Moving a toilet or tub is not a 200-dollar job under any reading.
At this budget, the money belongs on things that are visible from the doorway: walls, floor, mirror, light, and hardware.
Small Bathroom Trends Worth Copying on a Budget
The current look in small bathrooms in 2026 is warm minimalism with texture, and almost none of it requires construction.
- Warm minimalism over cool grey. Warm whites, oatmeal, soft clay, and pale sage make a small room feel larger than the same room in a cold blue-grey.
- One hardware finish, everywhere. Matte black for contrast, brushed nickel to blend with stainless fixtures. Pick one and repeat it on the towel bar, hooks, curtain rings, and cabinet knobs.
- Fluted and ribbed surfaces. Peel-and-stick wall panels give you the vertical texture trend for the price of a panel rather than the price of tile.
- Wood tones to warm up cool tile. A thrifted wood shelf or a wood-tone peel-and-stick floor breaks up the institutional feel of an existing beige floor you cannot afford to replace.
- Layered warm lighting. Overhead plus a vanity bulb plus a strip or sconce. Two or three light sources at a warm colour temperature beat one bright overhead.
- Fewer, larger objects. One big mirror, one wide rug, one matching towel set. Small scattered accessories make a small bathroom look busy.
Three Budget Tiers and How Long Each One Takes
If 200 dollars is the ceiling rather than the target, pick the tier that matches your weekend and your lease. All three stay under the number.
| Tier | Typical spend | What it includes | Best for |
|---|---|---|---|
| Quick refresh | 75 to 90 dollars | New shower curtain, matched hardware set, warm LED bulb, bath rug, thrifted mirror | Renters, 48 hours, no wall damage |
| Full 200-dollar refresh | 200 dollars | Paint, peel-and-stick floor, backsplash panel, mirror, lighting, hardware, curtain, textiles | Homeowners, one weekend, the full visible change |
| Renter pack | 150 to 200 dollars | Peel-and-stick floor and backsplash, removable mirror strip, curtain, over-door storage, textiles | Rentals with no painting permission |
Time matters as much as money. Here is how the same plan stretches across three schedules.
| Schedule | Jobs that fit | Realistic outcome |
|---|---|---|
| 48 hours | Curtain, hardware set, bulb, mirror, rug, towels, thrifted storage | A noticeably fresher room, no paint, no floor |
| One weekend | Everything in the 200-dollar plan | The full before-and-after |
| Two weekends | Full plan plus a second coat, trim work, deep clean, and reorganising the vanity | The result that photographs well |
Humidity-Safe Materials and the Vent Fan Check
Alberta bathrooms swing hard. Summer humidity and a cold-window condensation season both test cheap materials, so a few checks protect your 200 dollars.
- Pick bathroom-rated paint and acrylic latex caulk, not general interior caulk, on any joint near water.
- Use a bathroom-rated peel-and-stick floor with a waterproof backing, and keep the room dry for 72 hours before you start and 48 hours after.
- Run the vent fan during and for 20 minutes after every shower. If the fan is noisy, weak, or does not vent outside, moisture stays on the walls and fresh paint and new adhesive both suffer.
- Choose a light-reflecting paint with a matte or eggshell finish. A high-gloss finish shows every roller mark and every water spot.
Frequently Asked Questions
What is the least expensive way to remodel a bathroom?
Repaint the walls, replace the shower curtain, swap the towel bar and cabinet knobs, and hang a larger mirror. No demolition, no plumbing, no permits, and it usually costs 40 to 80 dollars for a change people notice right away.
What is the cheapest way to modernize my bathroom?
Change the lighting and the mirror first. One warm white LED bulb plus a wider mirror alters the brightness and the sense of modernity more per dollar than any other change, because both affect how the whole room reads.
What are some DIY bathroom remodel ideas on a budget?
Paint the walls in a light-reflecting shade, lay peel-and-stick vinyl on the floor, add a peel-and-stick backsplash panel, hang a bigger mirror, swap the light bulb, replace the hardware set, hang a new shower curtain, layer your lighting, add thrifted storage, and retextile the room.
What are some trendy ideas for small bathrooms in 2026?
Warm minimalism with texture: light-reflecting paint in warm white or pale sage, one repeated hardware finish such as matte black or brushed nickel, fluted or ribbed peel-and-stick wall panels, wood-tone accents, layered warm lighting, and fewer larger accessories instead of many small ones.
Can you remodel a bathroom for under 200 dollars?
Yes, as a surface refresh rather than a remodel. Paint, a peel-and-stick floor, a backsplash panel, a new mirror, a warm LED bulb, a matched hardware set, a new shower curtain, textiles, and thrifted storage all fit inside 200 dollars and take one weekend.
Is peel and stick tile good for bathroom floors?
It works well in a powder room, guest bath, or rental because it peels up cleanly, but only bathroom-rated vinyl with a waterproof backing belongs on a floor. Let the planks acclimate in the room for 72 hours, keep the surface clean, dry, and level, and keep the room dry for 48 hours after laying.
Conclusion
Cheap bathroom makeover ideas under 200 dollars all come down to one rule: spend the money on what a visitor sees first, and source the rest. Walls, floor, mirror, light, and hardware will carry the room. Everything else is thrift-store patience and a weekend.
Pick your two ideas from the list above, set aside the 200 dollars, and take a before photo before you start so you have proof of the change later.