
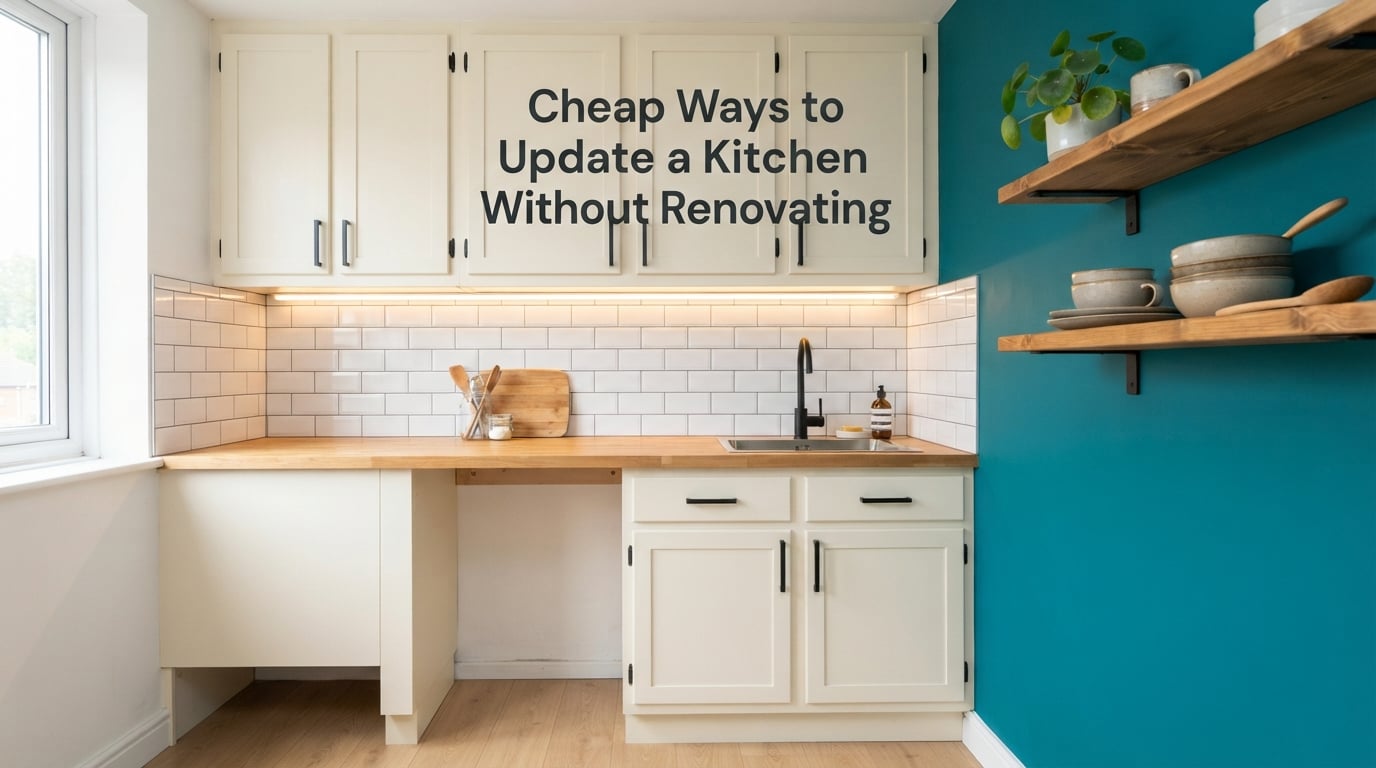
Yes, you can update a kitchen without renovating it. Almost every cheap kitchen update is a surface change: cabinet paint or vinyl, new hardware, a peel-and-stick backsplash, brighter lighting, a filmed or refinished countertop, and a serious declutter. None of that needs demolition, permits, or a plumber, and most of it happens in a weekend.
That is the definition used throughout this guide: an update changes the finish layer of a kitchen while the layout, the cabinet boxes and the plumbing stay exactly where they are. A renovation replaces the bones. An update reskins them.
I have priced every idea below in Canadian dollars with Edmonton and Alberta sourcing in mind, because almost every ranking page for this topic quotes US or UK money. Costs are realistic ranges for materials plus a modest tool allowance, and they move, so check a local Home Depot Canada, RONA or Canadian Tire before you buy.
What follows: a quick-pick list of 12 updates with CAD ranges, a cost-versus-impact breakdown, step-by-step instructions for the three projects that go wrong most often, a renter-safe section, a clear list of jobs to hand to a pro, and a phased plan for when the budget arrives in pieces.
Table of Contents
- Cheap Ways to Update a Kitchen Without Renovating
- What Each Kitchen Update Costs in Edmonton
- How to Paint Kitchen Cabinets Without Replacing Them
- Cheap Backsplash Ideas for a Dated or Rental Kitchen
- Swap the Cabinet Hardware
- Update the Lighting Before Anything Else
- Refresh the Countertop Without Replacing It
- Open Shelving and Removing Cabinet Doors
- Faucet, Sink and the Small Stuff
- Declutter and Reorganize
- Renter-Friendly Kitchen Updates You Can Undo
- What Not to DIY, and How to Spot a Contractor Upsell
- What 100 CAD, 500 CAD and 1,500 CAD Get You
- How to Phase a Kitchen Refresh Over Several Months
- Edmonton Notes for a Budget Kitchen Makeover
- What These Updates Look Like a Year Later
- A Two-Weekend Refresh Timeline
- Frequently Asked Questions
- How do you upgrade your kitchen without actually renovating it?
- What is the cheapest way to revamp my kitchen?
- What is the cheapest way to refresh kitchen cabinets without replacing them?
- How do you modernize a kitchen on a budget?
- What are the cheapest kitchen updates that still look good?
- What are some DIY ideas for a rental kitchen makeover?
- Can you redo a kitchen for 5,000 Canadian dollars?
- What should I update first in a kitchen?
- Should I renovate my kitchen or just update it?
- Wrapping Up Your Budget Kitchen Makeover
Cheap Ways to Update a Kitchen Without Renovating
Here is the short list. Every item keeps the cabinets, the counters and the layout in place, and every item can be reversed or redone later.
- Declutter and purge the counters. 0 to 40 CAD. The single highest-impact change in the list, and it costs nothing but a weekend.
- Swap cabinet knobs and pulls. 40 to 180 CAD depending on how many pieces you have. Do this even if you plan to paint the doors later.
- Paint the cabinet doors and drawers. 120 to 350 CAD in paint, primer, deglosser and a topcoat. The biggest visual jump of any single project.
- Apply peel-and-stick backsplash tile. 70 to 200 CAD for a normal run of wall. Peels off clean, which makes it a renter favourite.
- Paint or glaze the existing backsplash tile. 40 to 90 CAD if the grout is still solid. Fails fast on loose grout.
- Add under-cabinet LED strip lighting. 50 to 150 CAD. The cheapest way to make a dark kitchen look expensive.
- Replace the pendant or ceiling fixture. 60 to 400 CAD, or near zero if you reuse the existing box and swap the bulb.
- Refinish or film the countertop. 60 to 300 CAD. A refinishing kit for laminate, adhesive film for a rental.
- Replace the faucet. 90 to 300 CAD installed, or 60 to 200 CAD if you are comfortable with a supply line swap.
- Hang open shelving or remove upper cabinet doors. 30 to 250 CAD for brackets and shelving, zero for the doors if you keep the hinges.
- Add drawer organizers and a pantry reset. 40 to 120 CAD. Invisible from the doorway, transformative from inside a drawer.
- Finish with textiles, plants and a washable mat. 50 to 200 CAD. Softens a hard room and hides tired flooring for a while.
Pick three from this list, not twelve. Doing everything at once is how a refresh turns into a flip, and looking cheap was the number one complaint in the reader discussions we reviewed.
What Each Kitchen Update Costs in Edmonton
Here is the honest comparison, cheapest first. The impact rating is the one that matters when the money is tight: three medium-impact changes beat one large change you cannot finish.
- Declutter and reorganize — 0 to 120 CAD. Easy, renter-safe, very high impact.
- Cabinet hardware swap — 40 to 180 CAD. Easy, renter-safe with patching, high impact.
- Cabinet painting — 120 to 350 CAD. Medium difficulty, not renter-safe, very high impact.
- Peel-and-stick backsplash — 70 to 200 CAD. Easy, renter-safe, high impact.
- Tile paint on existing tile — 40 to 90 CAD. Easy, not renter-safe, medium impact.
- Under-cabinet LED strip — 50 to 150 CAD. Easy, mostly renter-safe, high impact.
- Light fixture swap — 60 to 400 CAD. Medium to hard, not renter-safe, high impact.
- Countertop film or refinishing kit — 60 to 300 CAD. Medium, film only is renter-safe, high impact.
- Faucet replacement — 90 to 300 CAD. Medium, not renter-safe, medium impact.
- Open shelving — 30 to 250 CAD. Medium, renter-safe with patching, medium impact.
- Paint on the walls — 120 to 350 CAD. Medium, not renter-safe, medium impact.
Two numbers to keep in mind as you read: hold back 10 to 15 percent of your total as a contingency buffer, and remember that Edmonton sales tax adds 5 percent GST plus provincial tax to most of these materials.
How to Paint Kitchen Cabinets Without Replacing Them
Painting doors and drawer fronts is the highest-impact project on this list, and it is the one that most often goes wrong. The failure almost always comes down to the paint choice.
- Remove every door and front. Label the inside edge of each one with masking tape and a marker so you can put the kitchen back in the right order.
- Wash off the grease. A kitchen cabinet door holds a film of cooking oil that will stop paint from adhering. Wash with a degreaser, then sand lightly with 120 grit.
- Degloss the surface. A TSP substitute or dedicated deglosser on a damp cloth, wiped off with a clean cloth. Skipping this is the second common failure.
- Prime with a bonding primer. On painted or previously finished cabinets, an adhesion-promoting bonding primer is not optional. A cheap latex primer will peel off in sheets within a year.
- Paint with kitchen-cupboard paint. Buy the product labelled for cabinets and kitchens. A renter we researched painted doors with chalky furniture paint and watched it stain and flake badly in a humid kitchen; a kitchen-cupboard formula held for nearly three years.
- Finish with a clear protective topcoat. A satin or semi-gloss waterborne topcoat in a kitchen-grade formula takes the scrubbing and the moisture.
Do not use matte or chalky paint on cabinets. It shows every fingerprint and it wipes clean in a way that makes the door look worse after a year of use.
Verdict: worth it if the cabinet boxes are solid and the doors are flat. Not worth it if the cabinets are hollow-core veneer over particle board and the edges are already swelling.
Cheap Backsplash Ideas for a Dated or Rental Kitchen
The backsplash is the surface your eye hits second, right after the cabinets. Three routes, cheapest first.
Peel-and-stick tile is the fastest. Clean the wall, mark a level line with a spirit level, cut panels to fit with a utility knife, peel the backing, press from the middle outward with a smoothing tool, and finish the edges with a bead of silicone. Buy a little more than you need, because panels from different production runs can vary in shade.
Tile paint works only on sound tile. If grout is crumbling, paint will only preserve the crumble. Brush on a two-part epoxy tile paint and the wall gets a completely different colour and a wipeable surface.
Paint the wall directly is the zero-material option. A satin or semi-gloss paint in a warm white on a coloured tile is a legitimate designer look, and it costs one gallon.
Verdict: peel-and-stick at 70 to 200 CAD gives the best return per dollar. Expect to redo edges near the sink within a few years, where water sits.
Swap the Cabinet Hardware
Hardware is the cheapest way to make a kitchen look deliberate. It changes the perceived age of the room more than its cost suggests.
Pick one style and commit. Mixing brushed brass pulls with black knobs reads as an accident, not a collection. Measure the existing hole spacing before you buy, because most older Edmonton homes have three inches between screw holes and modern hardware often ships with a different template.
A screwdriver and a tape measure are the whole tool list. If the doors are painted, add a little painter’s tape over the screw heads so you do not chip the new finish. Add a picture hook or two with removable strips if you are renting rather than drilling.
Sourcing tip: Facebook Marketplace and Habitat ReStore in Edmonton routinely have bins of mixed handles from renovation leftovers, often far cheaper than buying a new full set.
Verdict: the best ratio of impact to effort on this entire list. Do it first, even if you paint the doors afterward.
Update the Lighting Before Anything Else
A dated kitchen is usually a dark kitchen. Under-cabinet LED strip is 50 to 150 CAD, mounts with adhesive or clips, and changes the feel of a room more than any single decorating purchase.
Two things decide whether it looks good or looks like a science project. First, hide the strip. Mount it along the underside rail of the cabinet, set back from the front edge, so you see light on the counter and not the source. Second, buy dimmable. Bright strip at 5000 Kelvin makes a kitchen look clinical; dimmed down to a warm tone it looks like a restaurant.
If your ceiling fixture has a standard box and the wiring is straightforward, a new pendant can be a 60 to 400 CAD swap. Anything involving new junction boxes, new circuit runs or a panel upgrade belongs in the hire-a-pro list below.
Verdict: best value per dollar after decluttering. Also the project most people do last when it should be done first.
Refresh the Countertop Without Replacing It
Laminate counters can be updated three ways, and the choice depends mostly on whether you own the counter.
Adhesive film is a peel-off covering. It is the renter option, chosen in our research specifically because it lifts off and leaves the original surface behind. It will not survive a hot pot set straight down, so treat it as a five-year surface, not a permanent one.
Countertop paint and epoxy kits work on laminate, though results vary more than the marketing suggests. The kits that include a real epoxy topcoat cost more and last considerably longer than the paint-only versions.
Refinishing by a specialist is a third route when the counter has a nice profile and you want it to last. Costs run well above the DIY kits but stay under replacement.
Verdict: film for rentals and rentals-to-be, a kit for a kitchen you will keep for five years, and consider leaving the counter alone entirely if you are phasing a bigger refresh later.
Open Shelving and Removing Cabinet Doors
Taking the upper doors off the two cabinets flanking a window instantly makes a room look lighter and less boxed in. Keep the hinges, store the screws in a labelled bag, and you can reinstall them in an afternoon.
Floating shelves on the removed carcass are 30 to 250 CAD depending on length and bracket count. Two shelves, loaded sparsely, read far more expensive than six shelves crammed with mugs.
The flip side is honesty: open shelving means visible dust, visible dishes and a visible pantry. If your household is chaotic, closed doors are the cheaper-looking choice, and that is fine.
Verdict: high impact, medium effort, and completely reversible if you keep the doors.
Faucet, Sink and the Small Stuff
A new faucet is the one fixture most worth replacing, at 90 to 300 CAD installed. It sits in the centre of the room, it is touched daily, and it is the fastest way to kill a dated look.
Replacing a faucet means shutting off the supply valves under the sink, disconnecting the lines, and dealing with a corroded connection on a house that predates you. If the shut-off valves do not turn, stop and call a plumber. That is not a learning opportunity.
Other small wins: a new dish rack, a fresh set of drying cloths, a washable anti-fatigue mat, a bin you actually want to look at, and new cabinet liner if the old one is peeling.
Verdict: the faucet pays for itself visually. The bin, the mat and the dish rack cost little and get used every single day.
Declutter and Reorganize
This is the least glamorous item on the list and the one that changes a photograph the most. Every online conversation about budget kitchens lands on the same complaint: a million ideas online, no prioritization, so people do the cheapest-looking project first and see no overall change.
Work in three passes. Purge means bin anything duplicated, broken, or unused for a year. Zone means everything lives near where you use it, and only daily items stay on the counter. Contain means drawer organizers, a riser shelf in the pantry, and a bin for the recycling that currently lives on the floor.
Budget 40 to 120 CAD for organizers and risers, or 0 CAD if you reuse containers from the recycling bin.
Verdict: do this before you buy anything else. Every other project looks better on a cleared counter.
Renter-Friendly Kitchen Updates You Can Undo
A renter-friendly update is reversible, changes no plumbing, wiring or cabinet boxes, and can be returned to original condition in a day. If you cannot describe how you would undo it, it is not renter-friendly.
- Peel-and-stick backsplash and countertop film, chosen because they lift off clean.
- Removable hooks and strips for shelves, towels and a herb pot instead of drilled brackets.
- Hardware swaps with touch-up paint for the holes underneath, on doors you can open and close rather than remove.
- Paint the walls back to the original colour, which the renter research found is the version of the plan that keeps the deposit intact. Get the original colour from the lease or the landlord before you buy a single gallon.
- Textiles, plants, storage and organization, which are pure additions and leave no trace.
- Light bulbs and lamp shades, which are swapped back in seconds.
The language matters as much as the project. A one-line email describing the changes, the reversibility and the timeline gets a yes far more often than showing up on moving day with a question.
What Not to DIY, and How to Spot a Contractor Upsell
Some jobs are restricted for safety and code reasons, not skill preference. This is the list I send to anyone who asks me where the line is.
- Moving or adding a sink, dishwasher or gas line. Plumbing and gas work carries wet and fire risk. Keep the layout; a removable drying rack covers the need.
- New circuit, panel work or moving a fixture box. Electrical shock and fire risk, and it needs a permit. Swap bulbs and add plug-in or LED strip lighting instead.
- Structural or wall changes. Load and support issues, permits required. Use freestanding shelving and tension-rod solutions.
- Anything involving asbestos-era materials. Older Edmonton housing stock makes this a serious health risk. Test before you disturb anything.
On hiring: the loudest complaint in the reader discussions was contractors refusing small jobs and pushing stone countertops, full appliance packages and expansions. That is not a quote, it is a sales pitch.
Three screening questions help. What is the smallest version of this job that solves my problem, and what does it cost? Do you charge for a visit, and is that credited to the work? Can you give me two references for jobs under a week? A trade who cannot answer the first question is not going to hold your budget.
What 100 CAD, 500 CAD and 1,500 CAD Get You
At about 100 CAD: declutter and reorganize, a new hardware set for a small kitchen, under-cabinet LED strip, a faucet reseal kit, and a gallon of satin paint for the walls. A renter in the UK completed a comparable full refresh for the equivalent of roughly this amount, itemized, and it held for nearly three years.
At about 500 CAD: everything above plus cabinet painting, a peel-and-stick backsplash, a new faucet, and one pendant swap. This is the sweet spot. It touches every surface the eye notices and none of the expensive ones.
At about 1,500 CAD: everything above plus a countertop refinishing kit, open shelving, drawer organizers throughout, and a proper paint job on the walls and trim. It starts to approach a light renovation without crossing the line.
As for the 5,000 CAD question: yes, but that is a real renovation budget, not an update budget. At that level you are looking at a cabinet refinisher or a small counter and sink replacement, and it is worth getting two or three quotes first.
How to Phase a Kitchen Refresh Over Several Months
Phasing is the answer to almost every budget objection, and it is the question almost nobody on this topic answers properly.
Phase one, first weekend: declutter, reorganize, wash the walls, and change the light bulbs. Cost near zero, and every later phase looks better because of it.
Phase two, month two: hardware and lighting, under-cabinet strip, new faucet if you are comfortable with it.
Phase three, when the savings allow: cabinet painting over a long weekend, with the doors drying in a spare room or garage. Edmonton winters make indoor drying necessary, and a second coat needs a dry room at 18 to 22 degrees.
Phase four, months later: backsplash and countertop film, the two projects that look best once the cabinets are already done.
Each phase improves the room on its own, so nothing you finish sits unfinished-looking waiting for the next phase.
Edmonton Notes for a Budget Kitchen Makeover
Four local realities change the math here.
Currency and tax. Every figure in this guide is CAD, and most materials carry 5 percent GST plus provincial tax. A US-dollar listicle will understate your bill by the exchange difference and then forget the tax entirely.
Cold climate wear. Silicone and caulk cure and fail differently in a dry cold interior. Choose a kitchen and bath silicone rated for wide temperature swings, and expect to refresh the sink and backsplash edges every few years, which is a normal maintenance cost rather than a failure.
Secondhand sourcing is genuinely good here. Habitat ReStore, Facebook Marketplace, curb alerts and surplus from reno crews are the cheapest source of hardware, shelving and light fixtures in the city. A neighbour’s renovation is how our research subject sourced shelving they then stained with leftover oil.
Older housing stock. Many Edmonton kitchens sit in homes where the electrical and plumbing dates to the 1960s. That is exactly why the update-not-renovating route is sensible: it avoids the upgrades that require opening walls.
What These Updates Look Like a Year Later
Durability is where cheap updates are honestly judged, so here is the reality check.
Hardware and lighting look exactly like day one. They are the best long-term value on the list.
Cabinet paint holds when you used a bonding primer, a kitchen-grade formula and a topcoat. It fails when you skip any one of those, and it fails first at the edges near the sink and the dishwasher.
Peel-and-stick backsplash is fine for years away from water. Edges near the sink lift within two to three years and re-stick or replace cheaply.
Countertop film shows heat marks and scuffs earlier than a refinished surface. Treat it as a five-year cover, not a fifteen-year one.
Tile paint is the first thing to check a year in. If the grout was sound it holds; if it was not, it is already crazing.
Storage and decluttering, as one reader put it, are the only updates that never look worse with time.
A Two-Weekend Refresh Timeline
Weekend one, day one: clear the counters, purge, donate, and photograph every door and drawer before touching it.
Weekend one, day two: wash and degloss the cabinet doors, sand, and apply the bonding primer. Let it cure overnight.
Weekend two, day one: first coat of cabinet paint in the morning, second coat in the evening, then the topcoat once the doors are firm to the touch.
Weekend two, day two: reinstall the doors, swap the hardware, fit the under-cabinet strip, and apply the peel-and-stick backsplash if that is in your plan.
Week two, following: organizers, textiles, plants, and the mat. Then take a photo from the doorway and compare it with the one you took on day one.
Frequently Asked Questions
How do you upgrade your kitchen without actually renovating it?
You change only the finish layer: repaint or refilm the cabinet doors, swap hardware, cover the backsplash with peel-and-stick tile or paint it, add brighter lighting, and update or cover the countertop. The layout, cabinet boxes, plumbing and wiring stay untouched, so no permits are usually needed and most of the work fits one or two weekends.
What is the cheapest way to revamp my kitchen?
Decluttering and reorganizing first, then new cabinet hardware, then under-cabinet LED lighting. Those three together cost under 100 CAD in most Edmonton homes and change a photograph more than any single expensive purchase. Paint, peel-and-stick backsplash and new textiles come next, at roughly 70 to 200 CAD each.
What is the cheapest way to refresh kitchen cabinets without replacing them?
Paint the doors and drawer fronts. Remove them, wash off the cooking grease, degloss, apply a bonding primer, then two coats of paint labelled for kitchen cabinets finished with a clear topcoat. A 120 to 350 CAD material budget covers a standard kitchen. If the doors are hollow-core with swelling edges, cabinet vinyl is the cheaper option.
How do you modernize a kitchen on a budget?
Work in this order: declutter, swap the hardware, add under-cabinet LED strip lighting, update the backsplash, then paint the cabinets. Lighting plus hardware plus a backsplash is roughly 200 to 500 CAD and reads as a modern kitchen, because those are the surfaces a visitor notices first. Save cabinet painting for last, once you have the skill and the patience.
What are the cheapest kitchen updates that still look good?
The updates that never look cheap are the ones that are consistent rather than clever. One hardware style used on every door, one warm white used on every wall, and one metal finish used on the faucet and the shelf brackets. Mixing three metals or three colours is what produces the flip look that readers complain about most often.
What are some DIY ideas for a rental kitchen makeover?
Choose reversible updates only: peel-and-stick backsplash, countertop film that peels off clean, removable adhesive strips instead of drilled brackets, a new faucet cover rather than a new faucet, and fresh textiles, plants and drawer organizers. Ask your landlord in writing before you start and keep a photo record, since the standard is returning the kitchen to its original condition.
Can you redo a kitchen for 5,000 Canadian dollars?
Yes, but 5,000 CAD is a small renovation budget rather than an update budget. At that level you can get a cabinet refinishing project, or a new countertop and sink, or professional installation of a full hardware, lighting and backsplash package. Get two or three written quotes, and be suspicious of anyone who wants to spend the whole figure on stone and appliances.
What should I update first in a kitchen?
Declutter and reorganize, because every other project photographs better on a cleared counter. Then lighting, because a dark kitchen makes cheap updates look cheap. Hardware comes third since it is the fastest job with the highest impact. Paint the cabinets last, and only once the rest of the plan is decided.
Should I renovate my kitchen or just update it?
Update it if the layout works, the cabinet boxes are solid, the plumbing and electrical are fine, and you are staying a few years. The update path runs 100 to 1,500 CAD and a couple of weekends. Renovate if the layout fails, cabinets are swollen or soft, or you are moving within two years and need the return on the full spend.
Wrapping Up Your Budget Kitchen Makeover
Cheap ways to update a kitchen without renovating all come back to the same three rules: change surfaces, not structure; do three things well instead of twelve things quickly; and spend in the order of declutter, lighting, hardware, backsplash, paint, countertop.
Start this weekend with the purge and the light bulbs. They cost almost nothing, they need no skill, and everything you do afterwards is easier. The full update range in Edmonton runs from roughly 100 CAD for the renter-grade version to about 1,500 CAD for a complete surface refresh, and a contractor should never tell you that a finish-level change is impossible on a modest budget.
Take a photo from the doorway before you buy anything, and take the second one a year later. That is the only honest way to tell whether a cheap update held up.